
I talk about the Sumali Blue dye all the time. I have repeated myself again and again that the ability to recognize the dye pigment is the cornerstone to evaluate a Yuan and an early Ming Blue & White. The shape of the ware, the way the motif is drawn and other details are not really that important. When the dye pigment is right, every other thing should fall into place, and you have no doubt that the ware is genuine and of the period, if it is marked.
The only problem here is that the Sumali Blue dye is something about which we know almost nothing, not even it place of origin. It is only a broad term with certain characteristics that are common to all Sumali Blue pigments. We know these characteristics, but unfortunately, for every specific characteristic, the way it presents itself and the quality vary through a wide range. We have seen that in the blue coloration, not to say the bubbles and plaques. In the old days, when critics could only describe these features in word, they had no choice but to do it in very broad terms, so that, many a time, we simply do not get it. Now, when I tell you the blue color is sapphire blue, I can actually show you the color, and you have no trouble in understanding it. This is the beauty of photography and computer technology combined. The same is true with bubbles and plaques. The vast variation in presentation of these specific features can largely be overcome by publishing more and more photos of these features in different wares. If, in the future, every collector can show and share the specific features of the wares that he owns in photos, very soon, we’ll have a very good idea of what these particular features should look and we’ll have no problem in evaluating such Blue & Whites.
With so many variants in each feature, due no doubt to varying quality of the dye, we know that some dye pigments must be better than the others. Any experienced collector can tell you that this is certainly true. How do we tell a good dye pigment? I have told you something about this in previous articles. But let me recap myself with this present B & W—a large Xuande B & W charger.
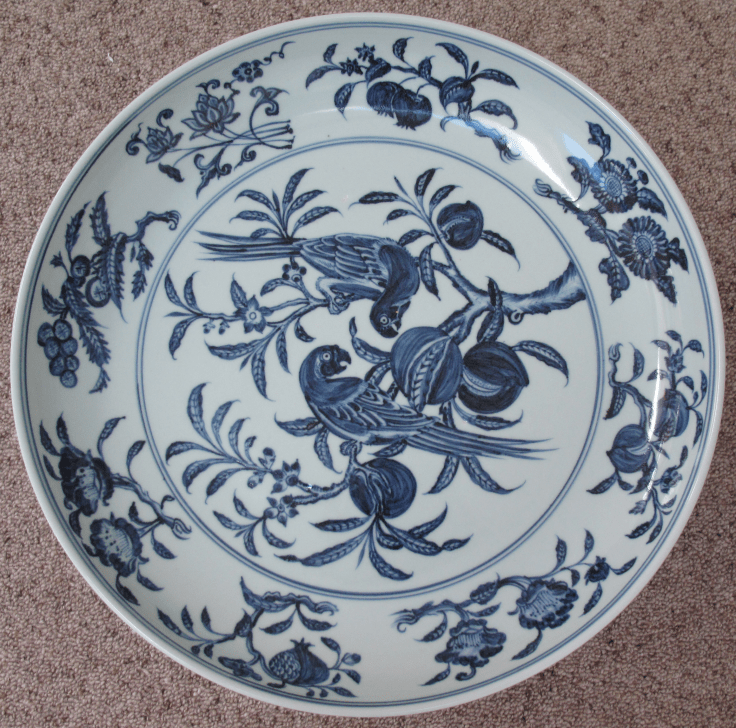 Figure 1
This charger measures 17 5/8 inches in diameter. Let me show you a few photos about the blue dye first.
 Figure 2
 Figure 3
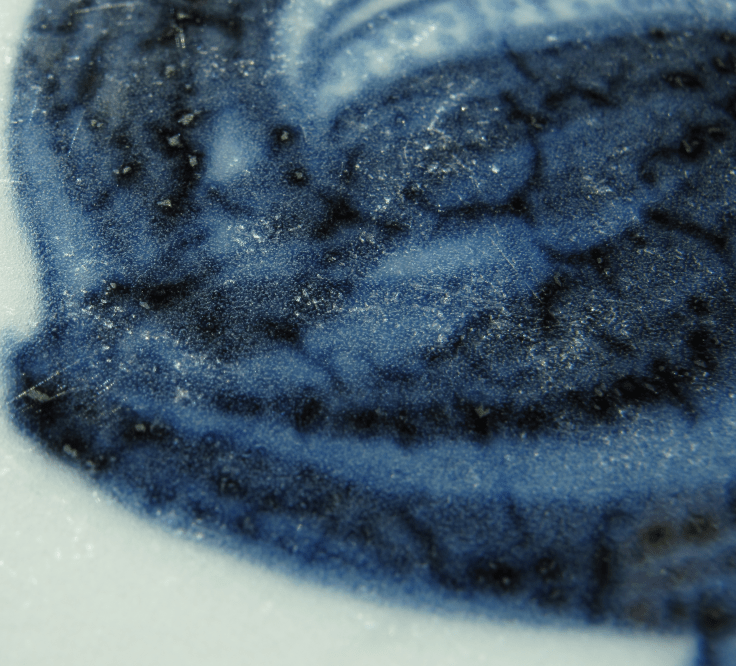 Figure 4
 Figure 5
In these four photos (Figures 2-5), you can see some mottling in the blue dye. By mottling, I mean the irregularly placed dark blue streaks that you see inside the large blue patch. These streaks are not deliberately done by the painters. Rather, they are blue dye pigments randomly deposited on the clay bisque of the plate. This kind of mottling is most commonly seen in Yuan and Yongle B &Ws. But, as you can see here. it is also present in Xuande B & Ws. When you see this, most of the time, it indicates that the dye is of very good quality. When you look at these blue streaks carefully, it is common for you to see large bubbles lurking inside. Can it be a variant of a plaque that is without the muddy layer and the shiny metallic layer on top?
I’ll show you a few more photos with features that are indicative of the quality of the dye.
 Figure 6
 Figure 7
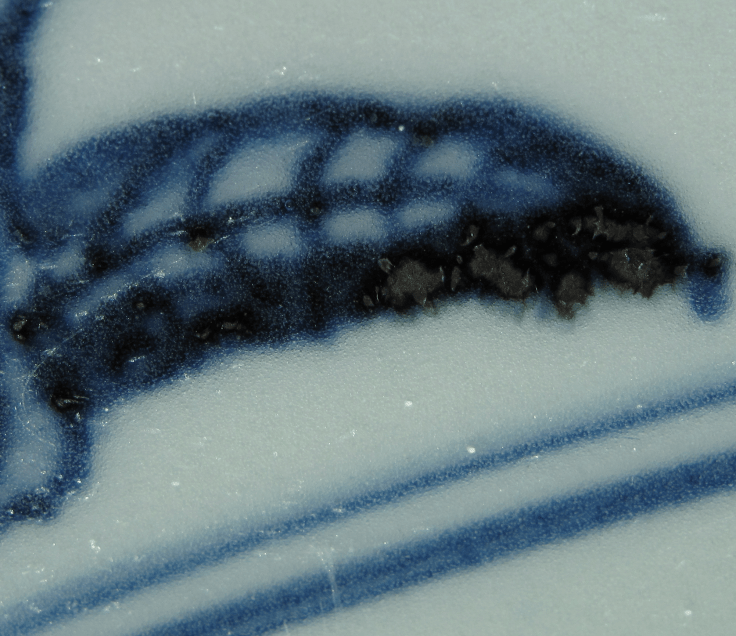 Figure 8
 Figure 9
 Figure 10
Look at Figures 6-10, and forget about the plaques for the time being. Concentrate on the flare. Enlarge the photos if you need to, and you can see a greenish tinge exuding from all these flares. As I have told you many times before, a flare that exudes this greenish tinge is an indicator that the dye is of fine quality. Here in this B & W, as you can see, there are many areas that are exuding this greenish tinge.
Now, let us look at the plaques. Here in this charger, all plaques are without the shiny metallic layer on top, they only have the muddy layer. Look at Figure 6, don’t you think that the plaque is beautiful? What about the plaques in Figure 10? These are not all. I’ll show you more plaques.
Look at Figures 11-13.
 Figure 11

Figure 12
 Figure 13
Figure 12 and 13 are actually part of Figure 11. The spiky colorful plaques are typical of Yongle, but also canoe seen in Xuande wares. In these photos, you can see very colorful linear structures that look like thickened lines surrounding the plaques proper. These linear structures, to me, are formed by particles that make up the plaques. But in this instance, they have not coalesced with the main plaque, and are still floating around it. This feature is something that is not very frequently seen, but I would say it is rather beautiful. If you were to enlarge the photo, you can see that many of the bubbles are colored by these particles.
I’ll show you two more photos with colorful particles next to the main plaque (Figures 14-15). Look at these photos carefully, you will appreciate the beauty of the early Ming plaques.
 Figure 14
 Figure 15
A dye with all these fine features, you would expect the bubbles to be very beautiful too. After all, our experience with the Sumali Blue dye is that the plaques, the flares, and the bubbles are all related. When one of these features is beautiful, the others should follow suit. Well, I would not say that the bubbles here are not beautiful, but the only critique that I have here is that the large bubbles are not large enough, and there are too few of them. I’ll should you a few photos, and you would know what I mean.
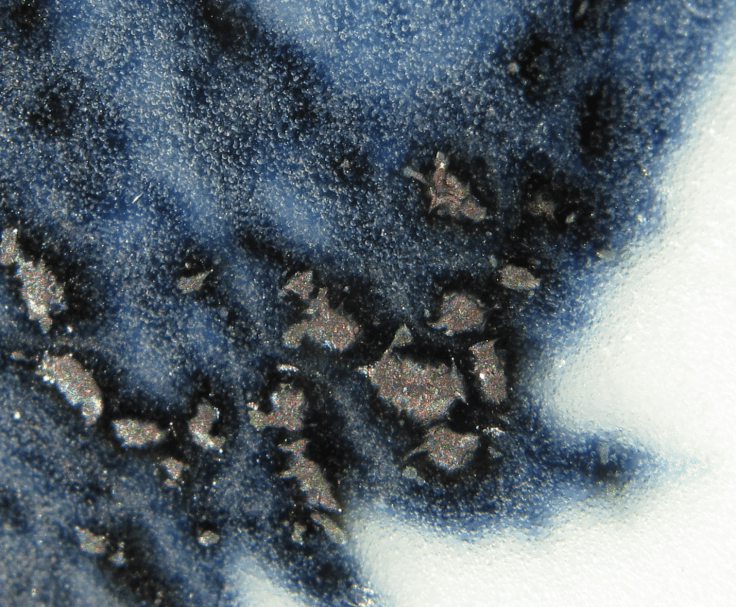 Figure 16
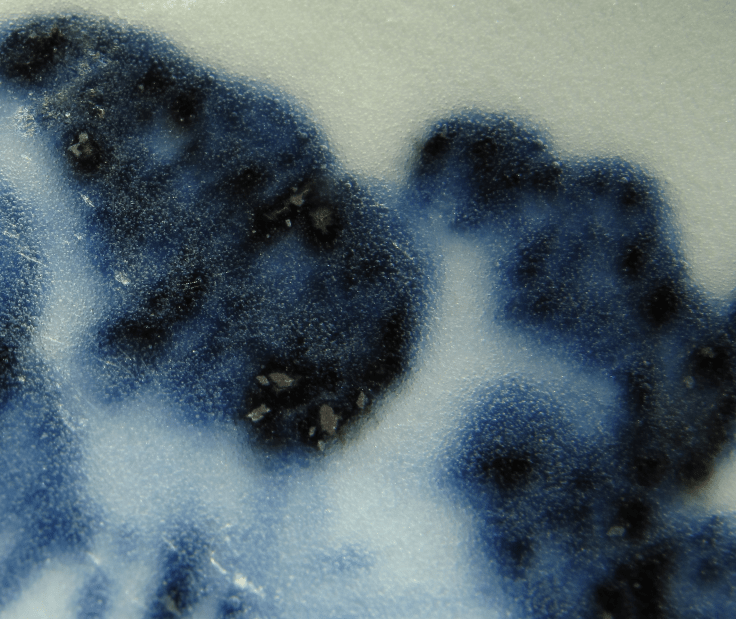 Figure 17
 Figure 18
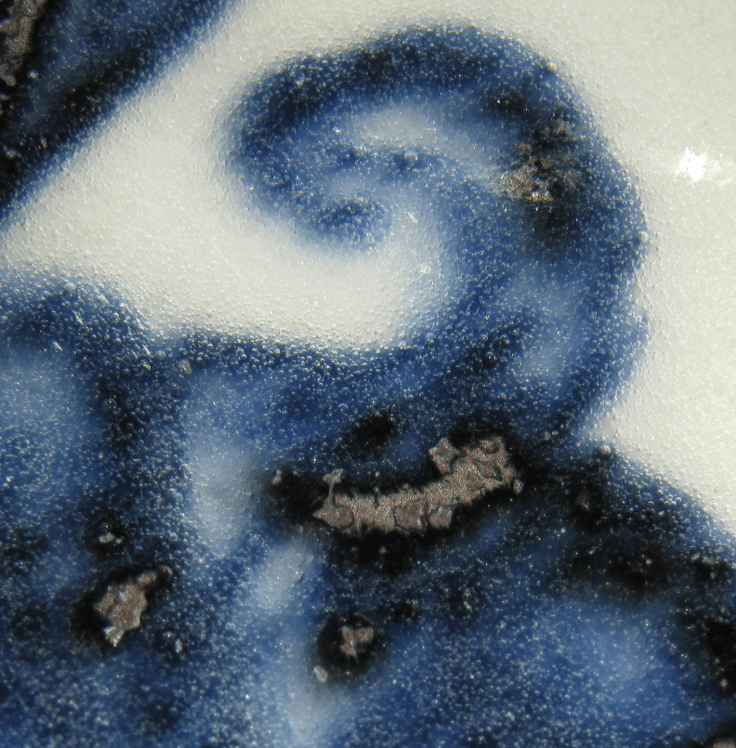 Figure 19
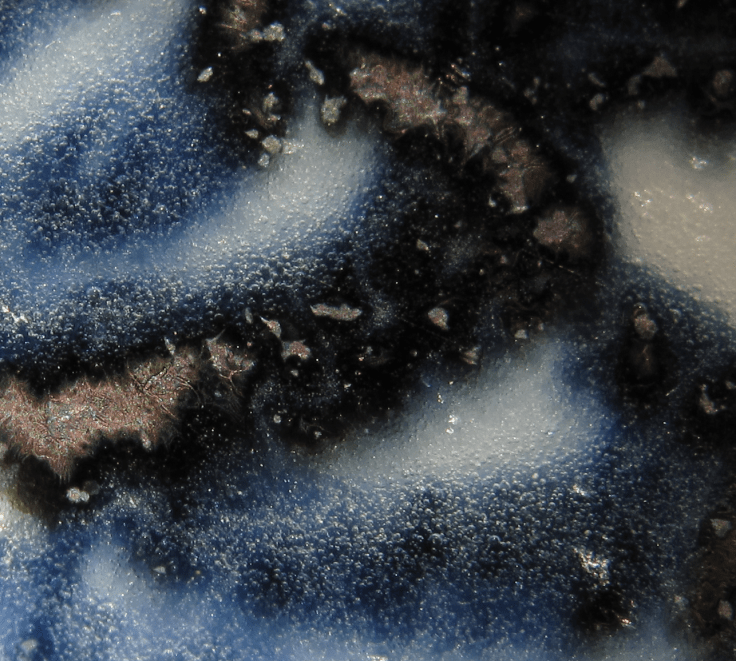 Figure 20
Look at these photos carefully (Figures 16-20) and enlarge them if you find it necessary. You will agree with me that you do see large bubbles here and there. There are just too few of them and they are not really very large. In Figure 18 you also see a string of four large bubbles at the right upper corner, and in Figure 20 you can see cluster of large bubbles lurking in the dark blue patch right at the center. All these are typical of early Ming Sumali Blue dye, and there can be no mistakes about that. But why are the bubbles smaller than most Sumali Blue dyes? We will never be able to answer that question. But that does not stop us from making some speculations.
I suspect this has a lot to do with the temperature in the kiln in the baking process. We must understand that we know very little about the baking process. We have little idea about the kiln and its design. The design must have changed with time. We do not know the kind of firewood the potters used—that must have something to do with the temperature that can be achieved. And we have no idea how the potters maintained the temperature nor the duration of the baking process. And the whereabout the wares were placed inside the kiln must play some part in the final outcome. In short, there are many aspects of the baking process that we do not know. It would be difficult for us to make any sensible speculation except that we know the bubble size should have some rather direct relationship with the temperature. So, here, when the bubble size is smaller than what we used to see, we can only blame it on a temperature that is lower than the norm.
You may want to know how the temperature may affect the lacunae formation. I’ll now show you a photo of the lacunae in this charger.
 Figure 21
You can see that in some area in this charger, lacunae formation is very obvious.

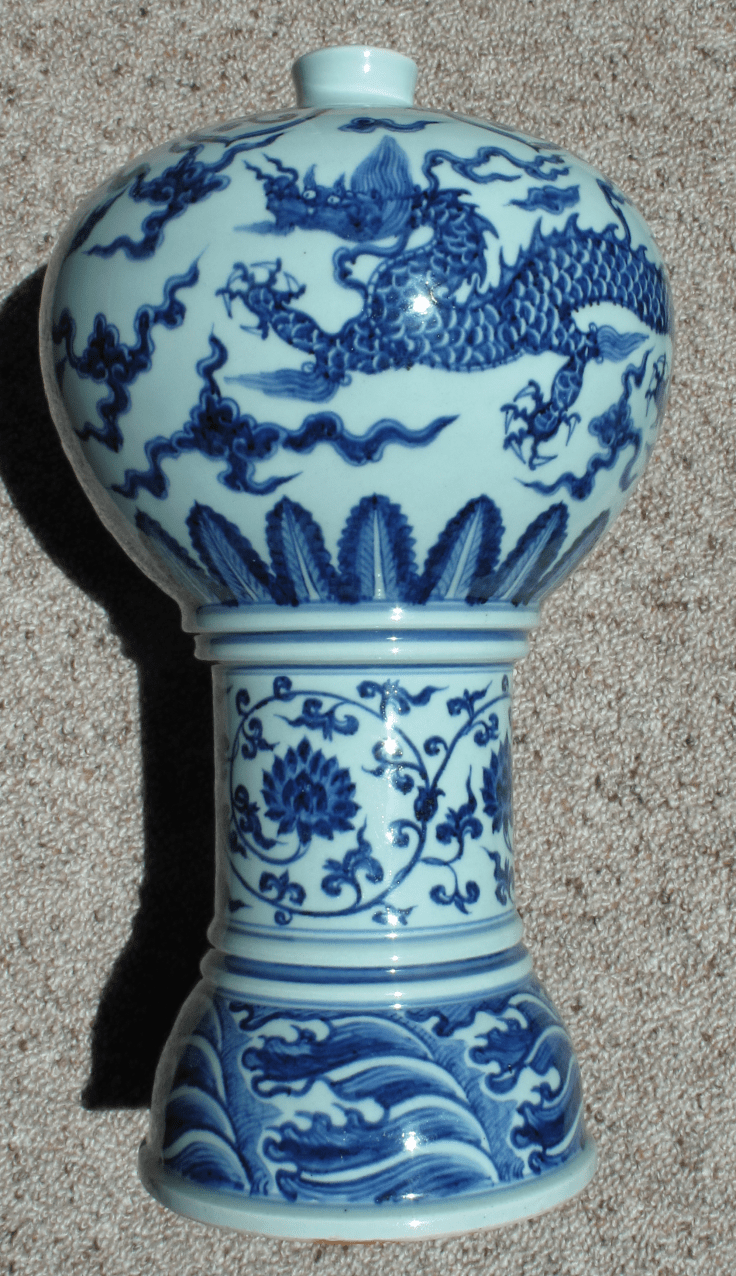 Figure 1
 Figure 2
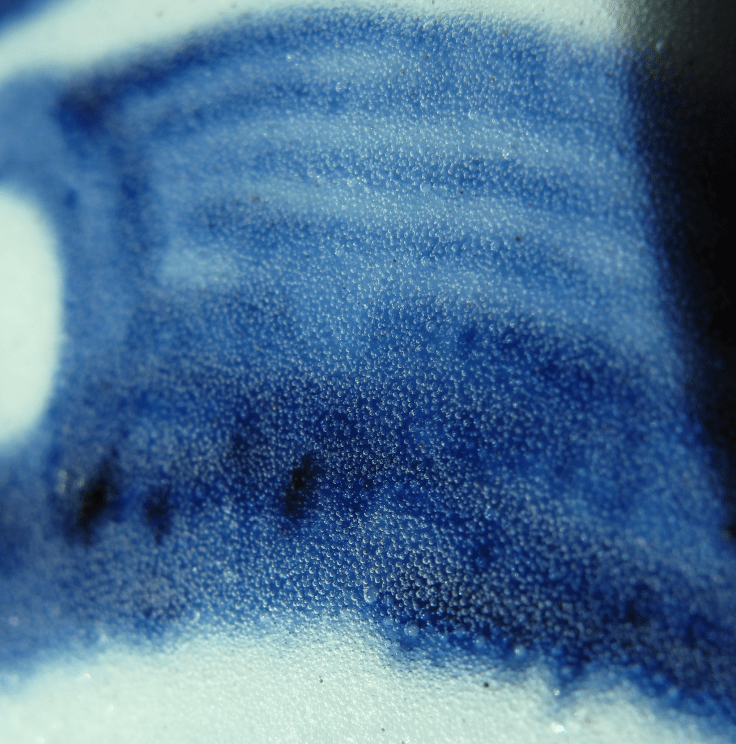 Figure 3
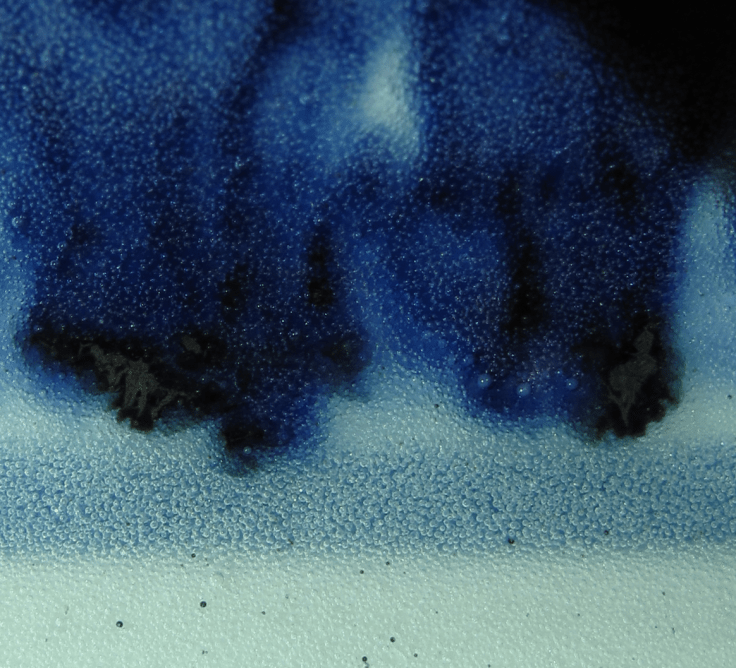 Figure 4
 Figure 5
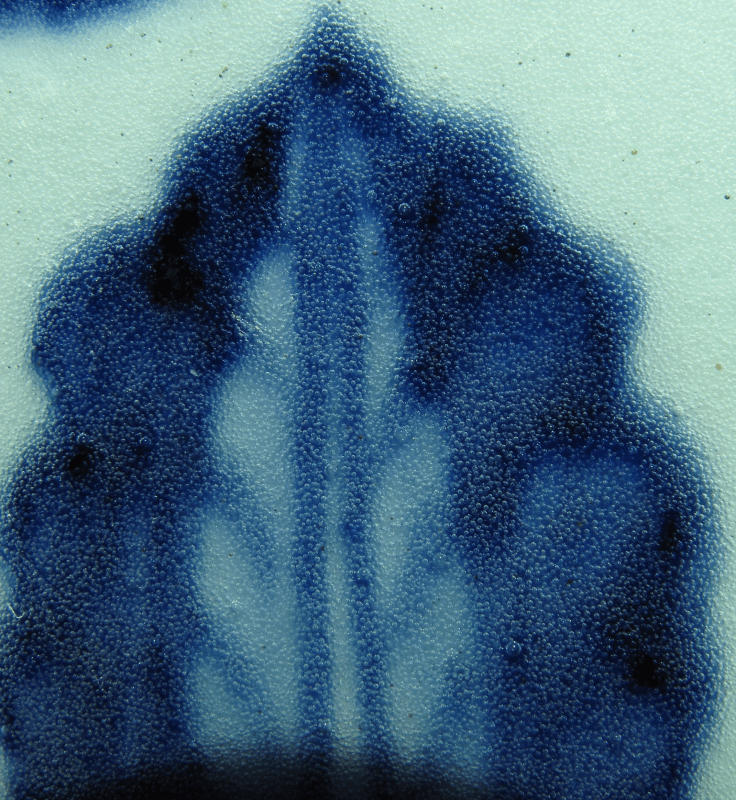 Figure 6
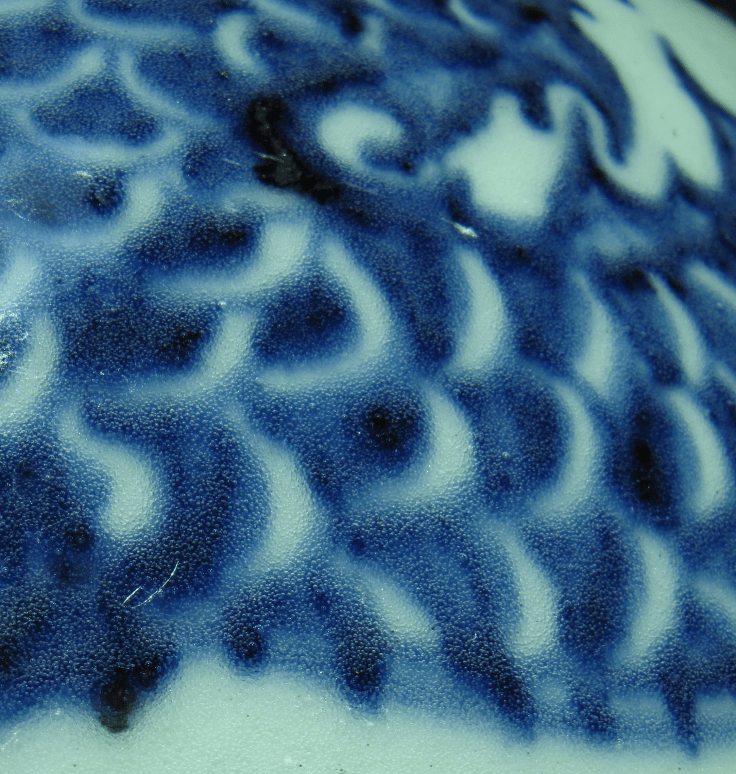 Figure 7
 Figure 8
 Figure 10
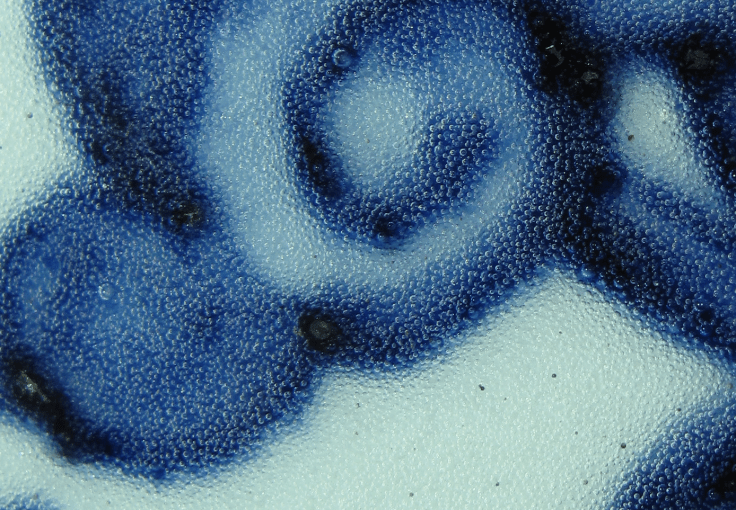 Figure 11
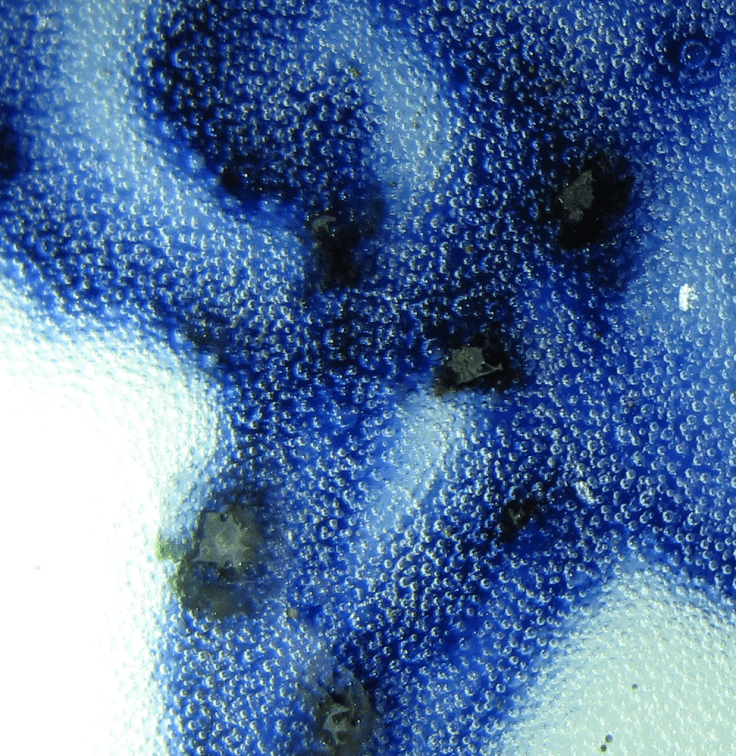 Figure 12
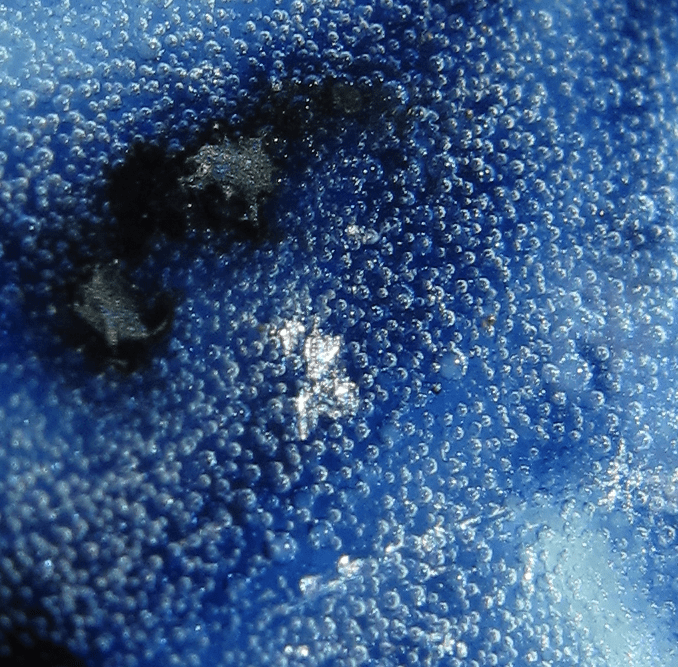 Figure 14
 Figure 15
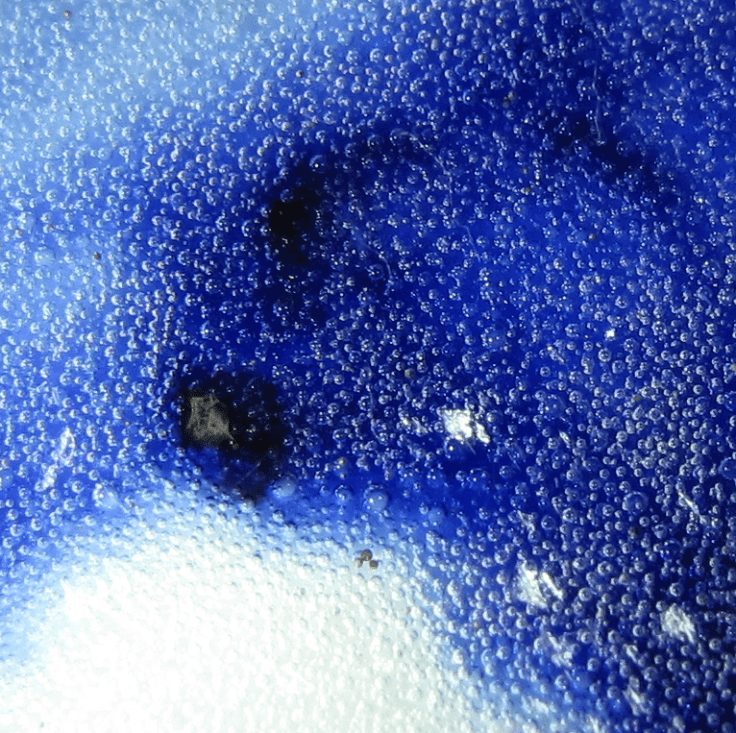 Figure 16
 Figure 18
  Figure 19
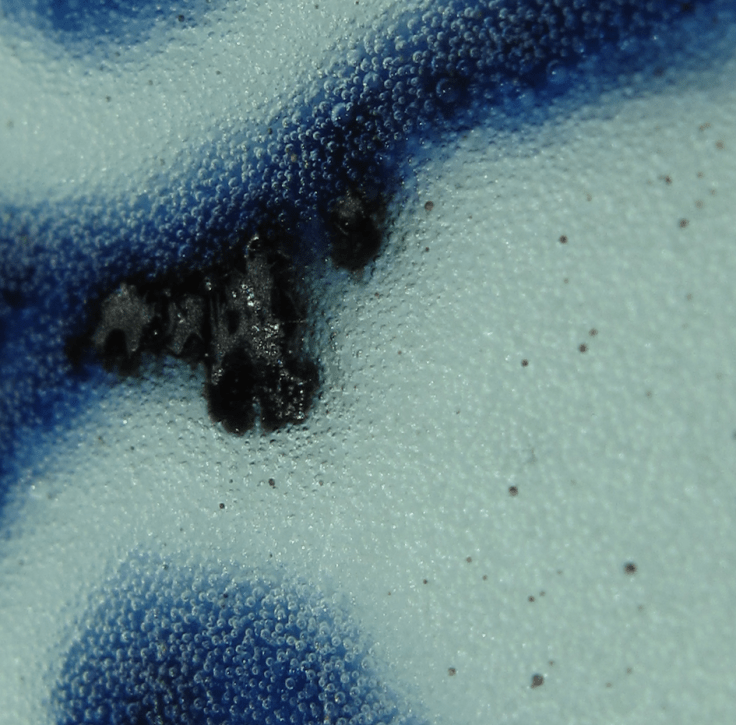 Figure 20
 Figure 21
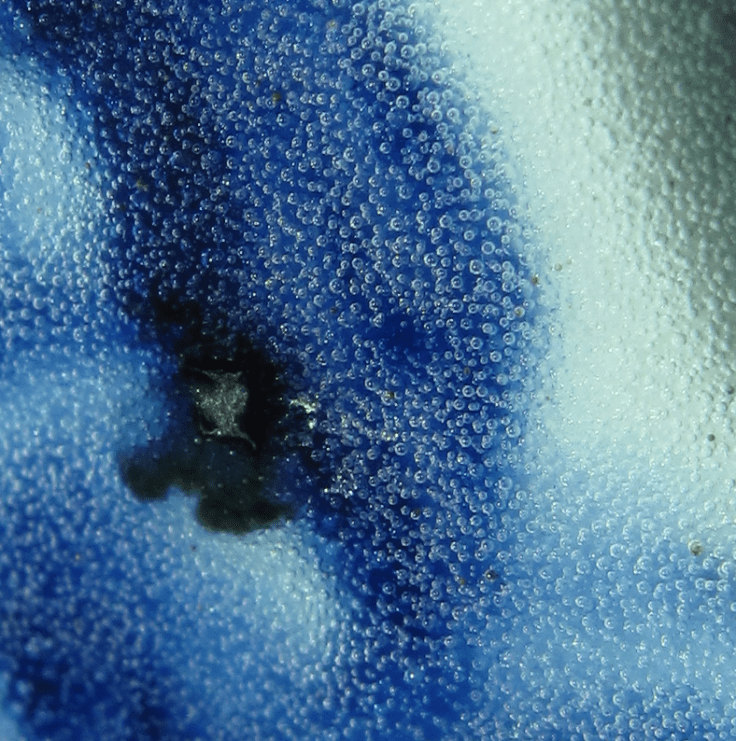 Figure 22
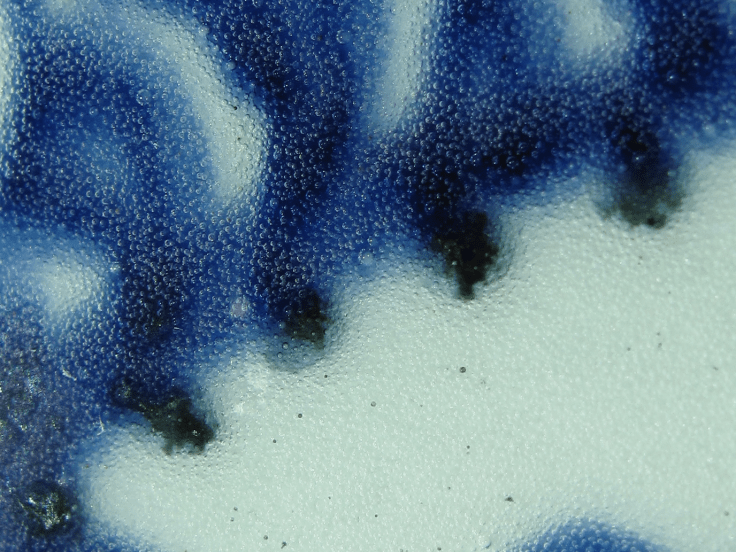 Figure 23
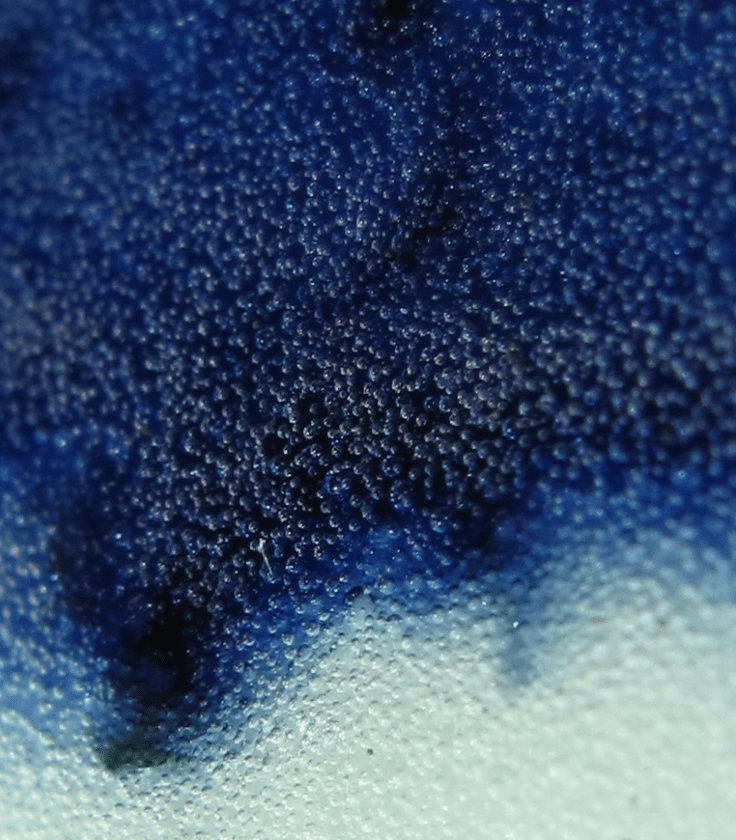 Figure 24
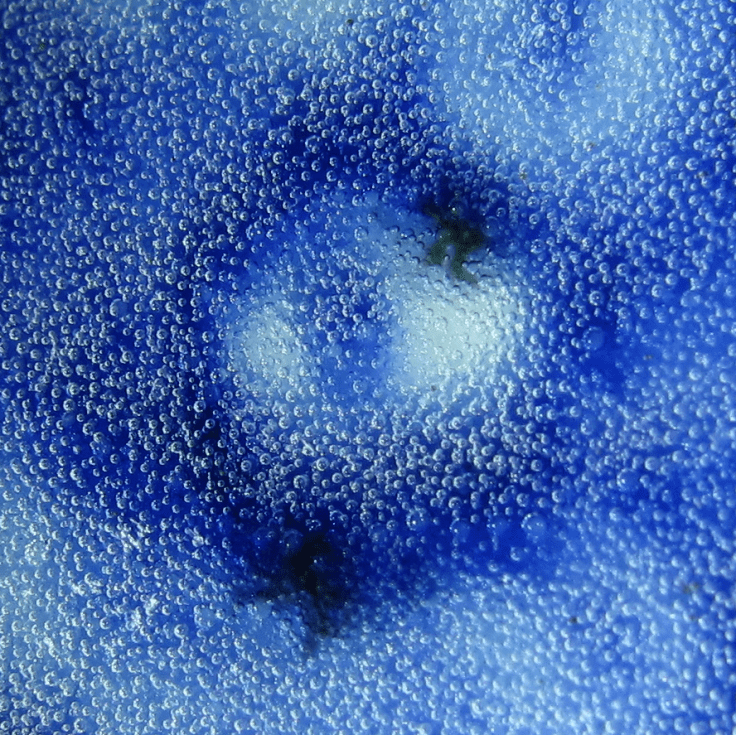 Figure 25
 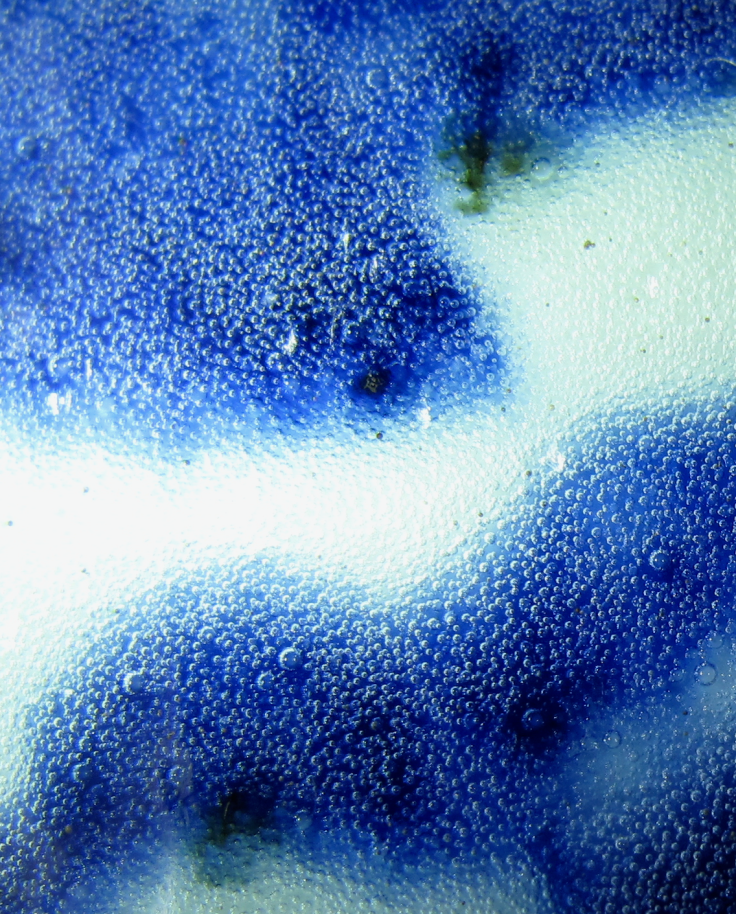 Figure 26
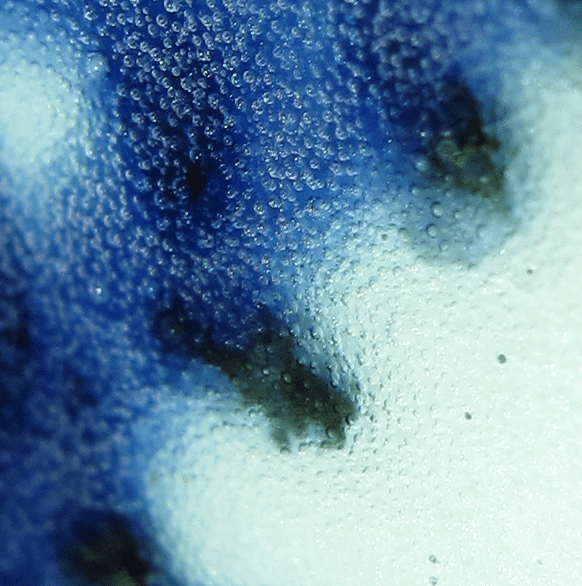

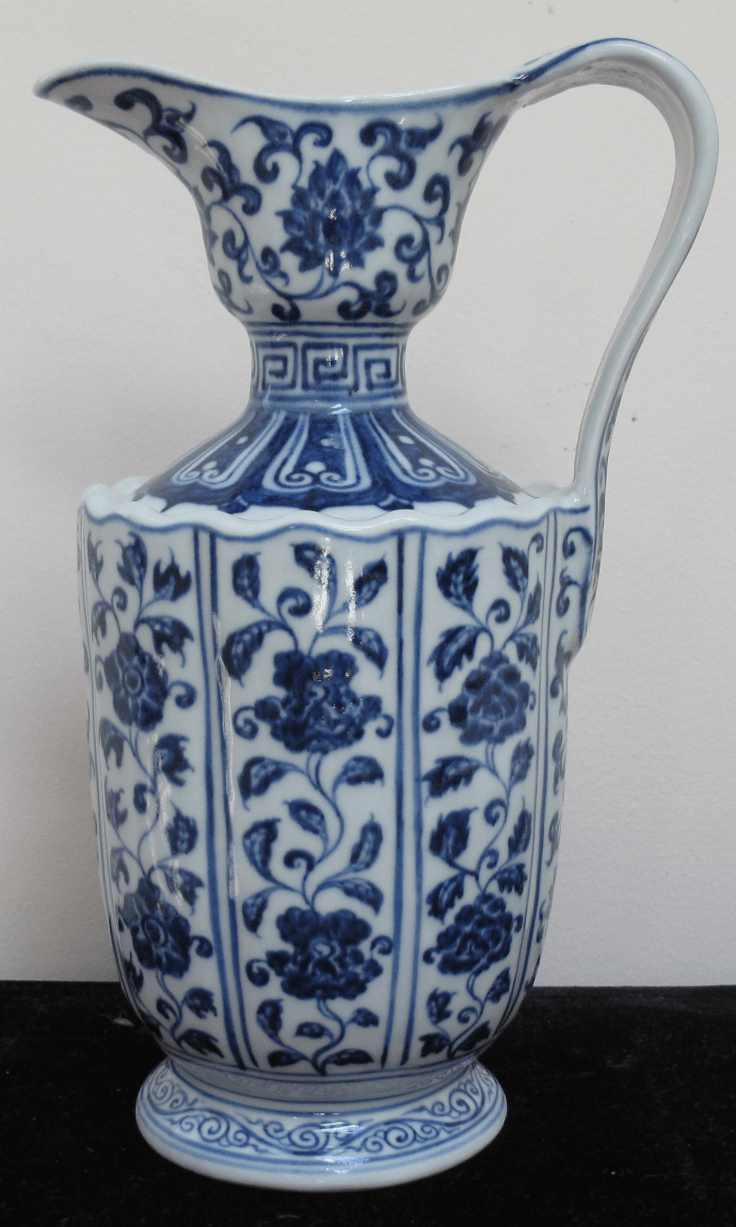 Figure 1
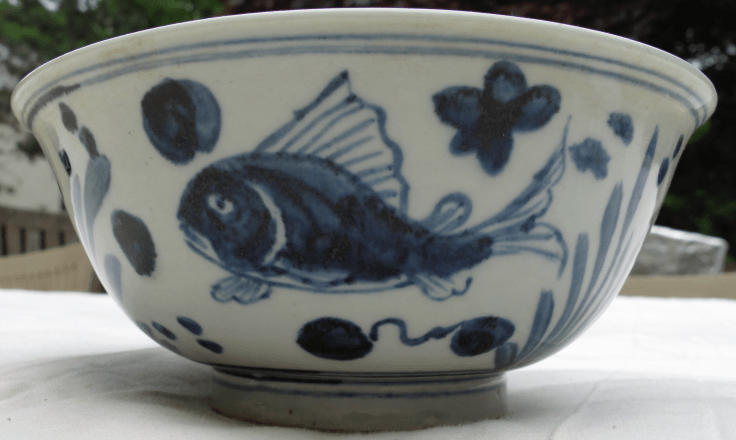 Figure 1
 Figure 2
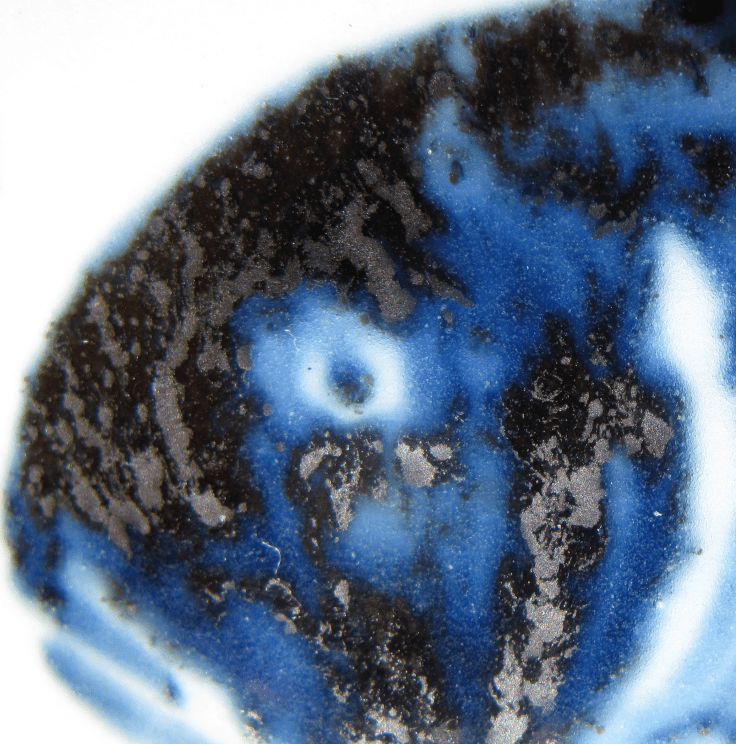 Figure 3
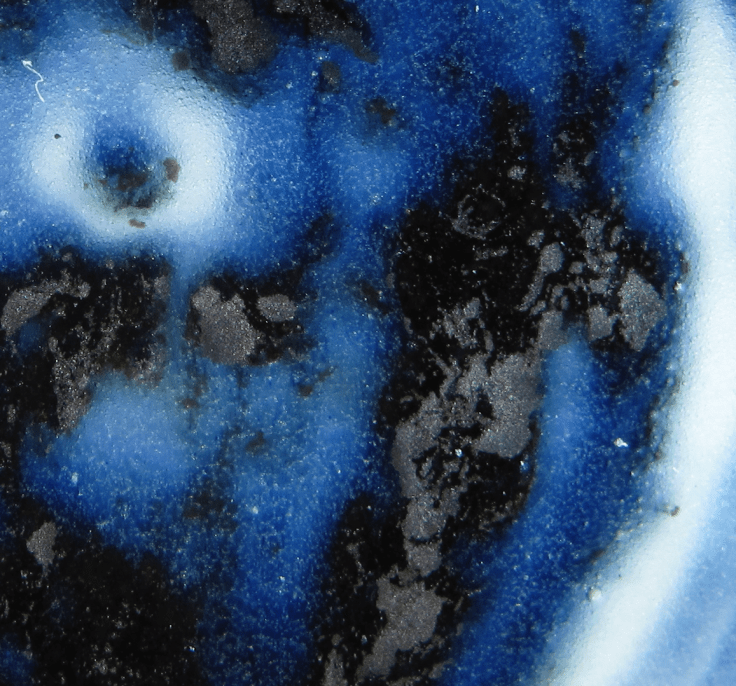 Figure 4
 Figure 5
 Figure 6
 Figure 7
 Figure 8
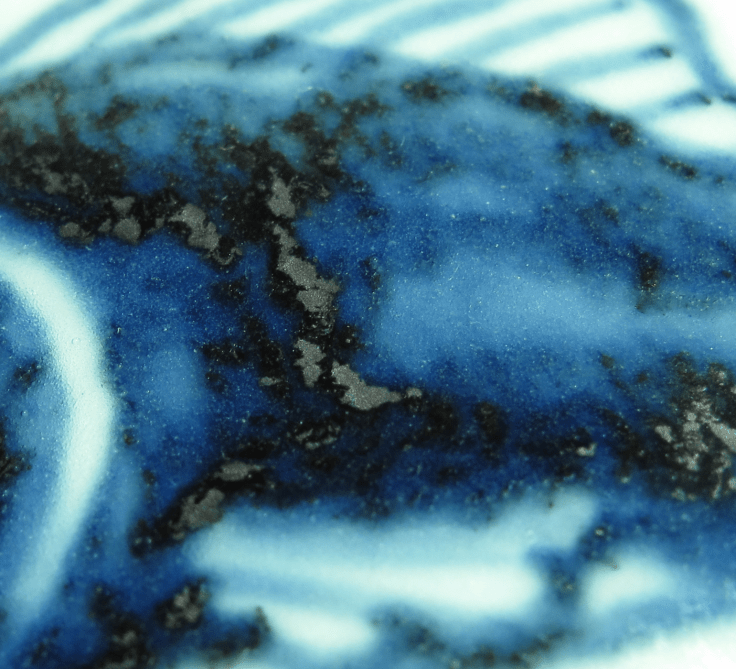 Figure 9
 Figure 10
 Figure 11
 Figure 12
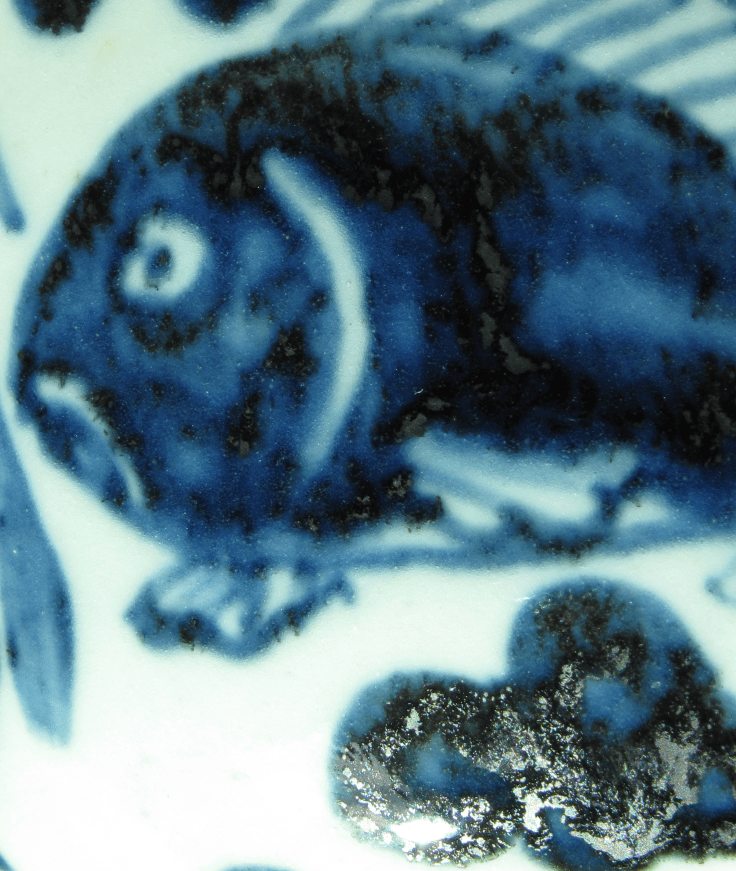 Figure 13
 Figure 14
  Figure 15
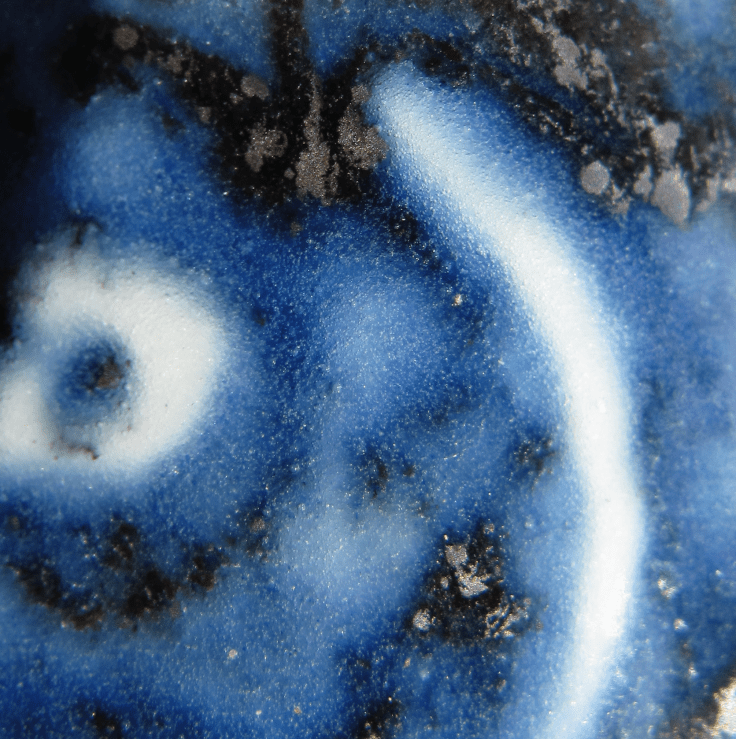 Figure 16
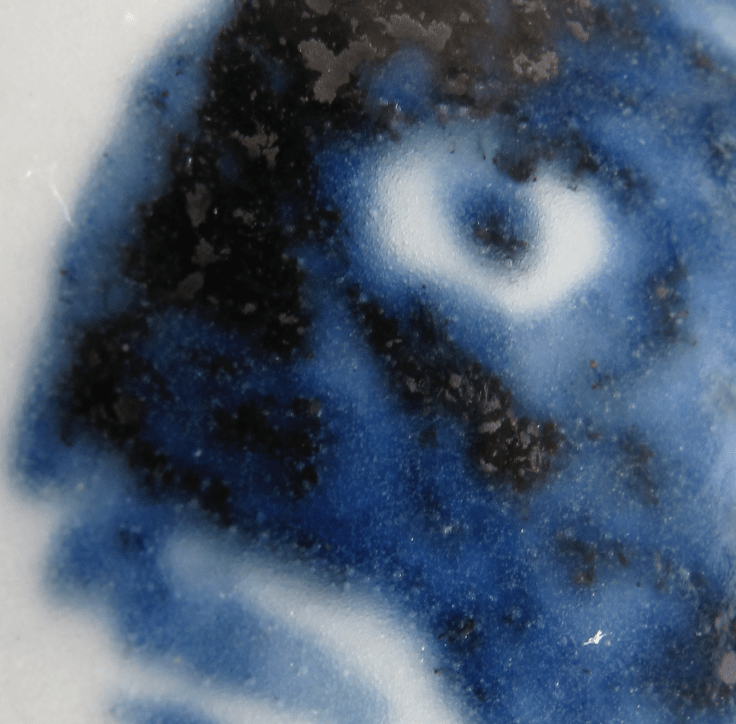 Figure 17
 Figure 18
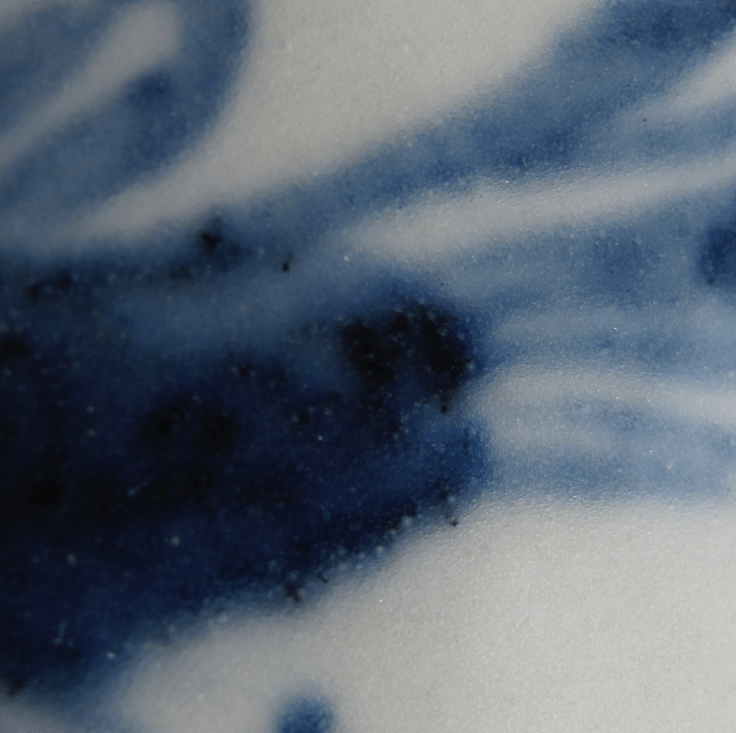 Figure 19
 Figure 20
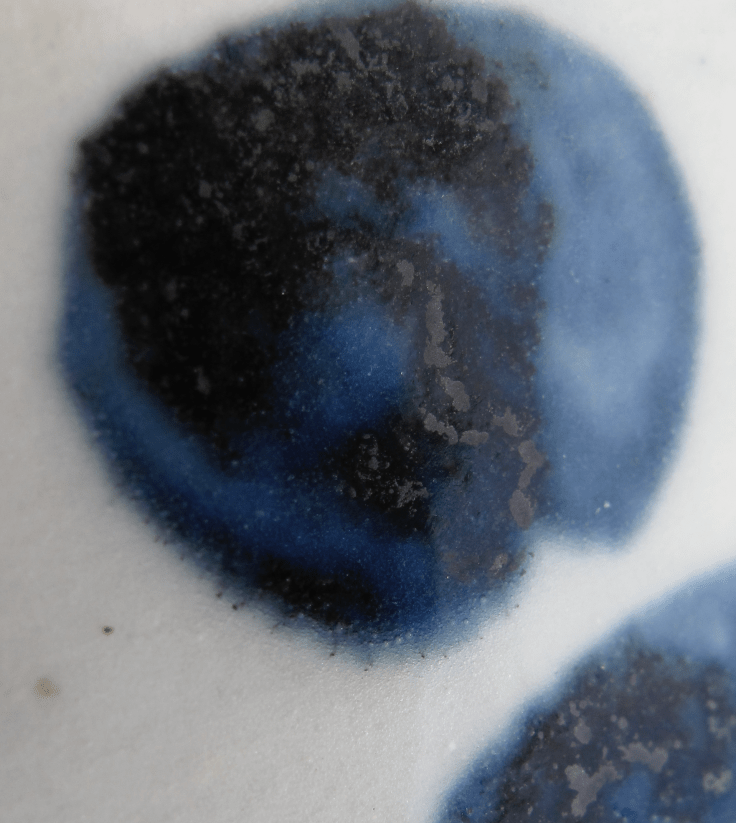 Figure 21
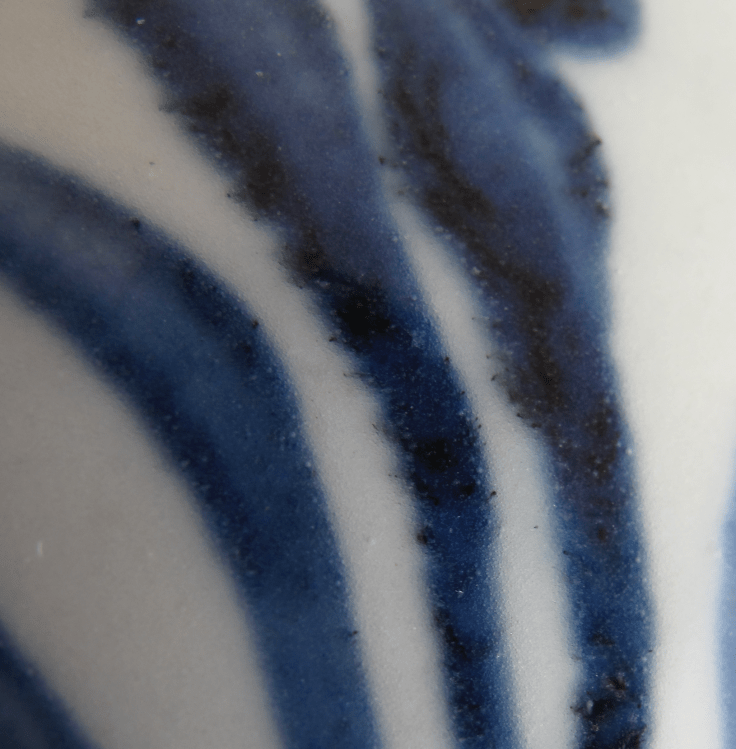 Figure 22
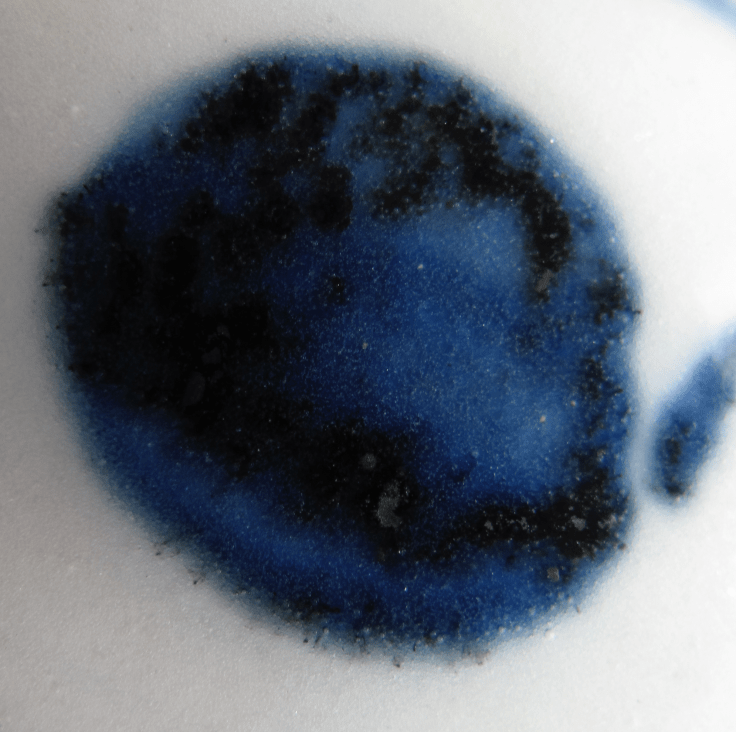 Figure 23
 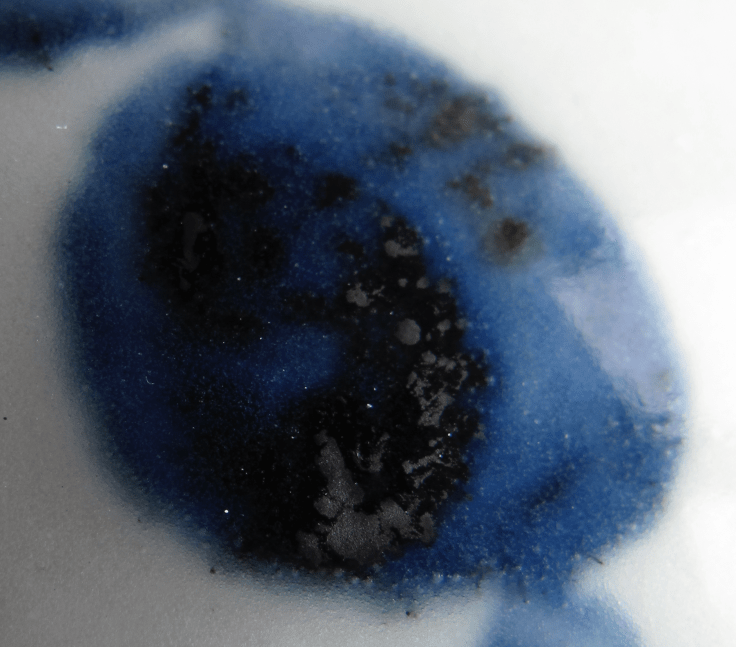 Figure 24
  Figure 25
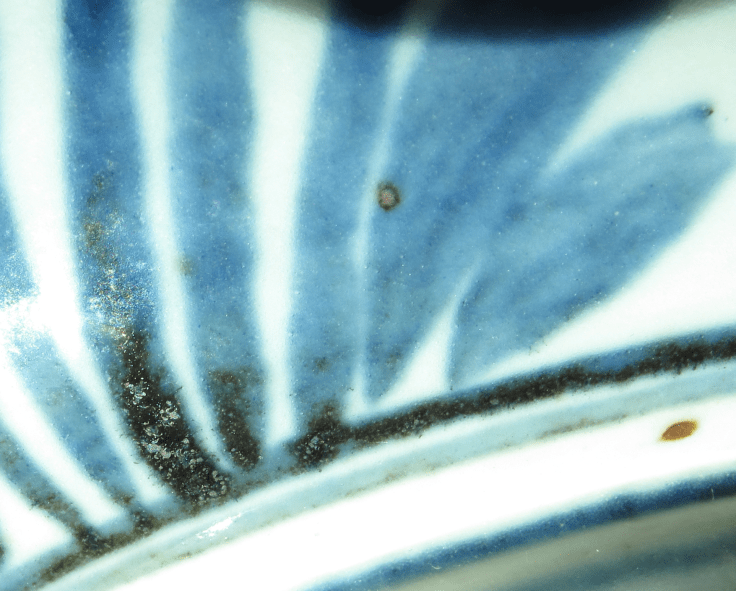 Figure 26
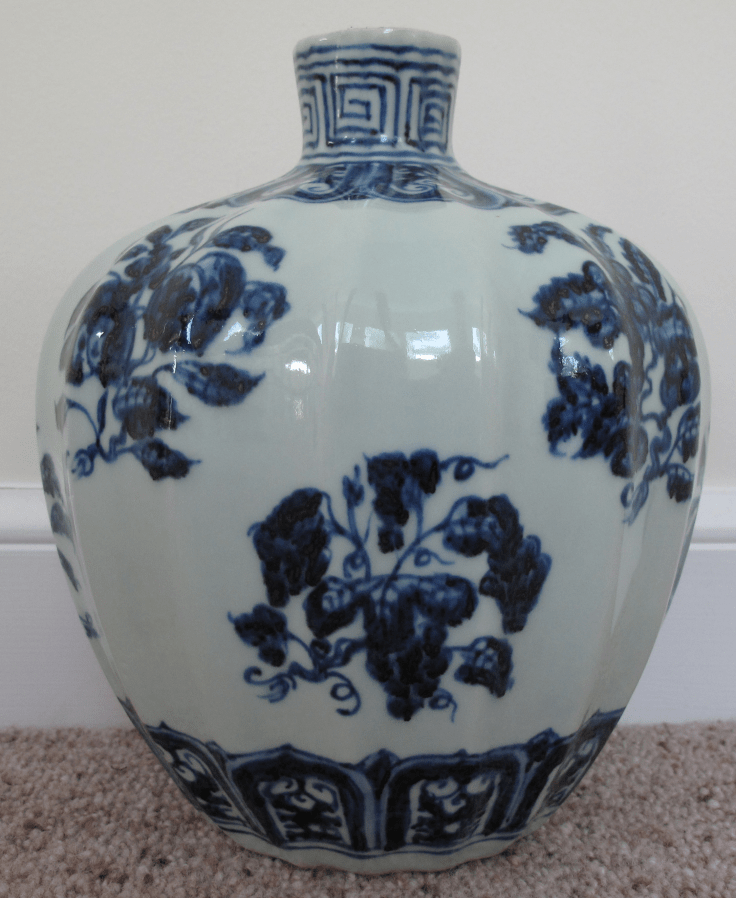 Figure 1
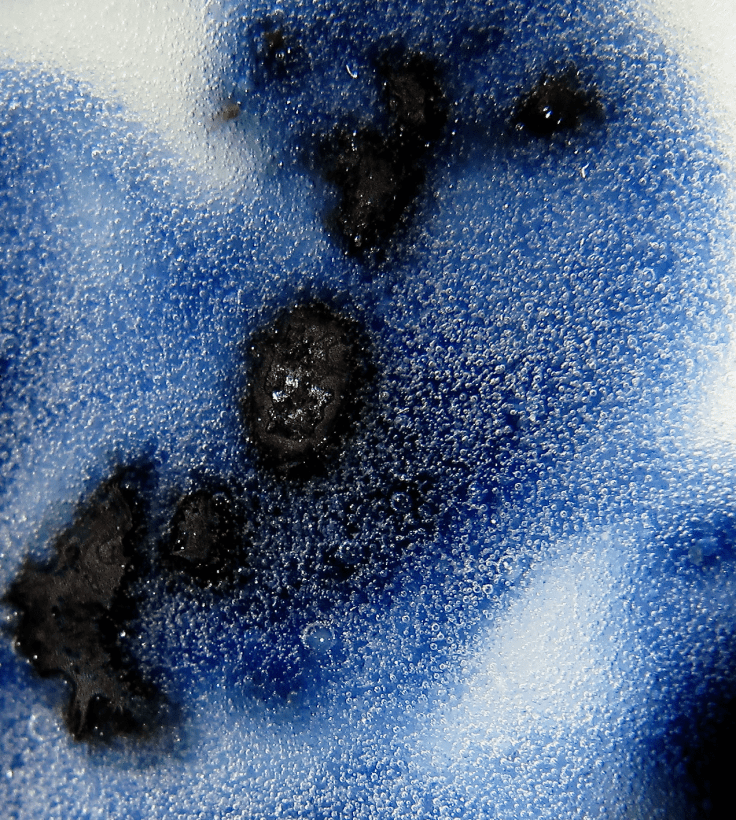
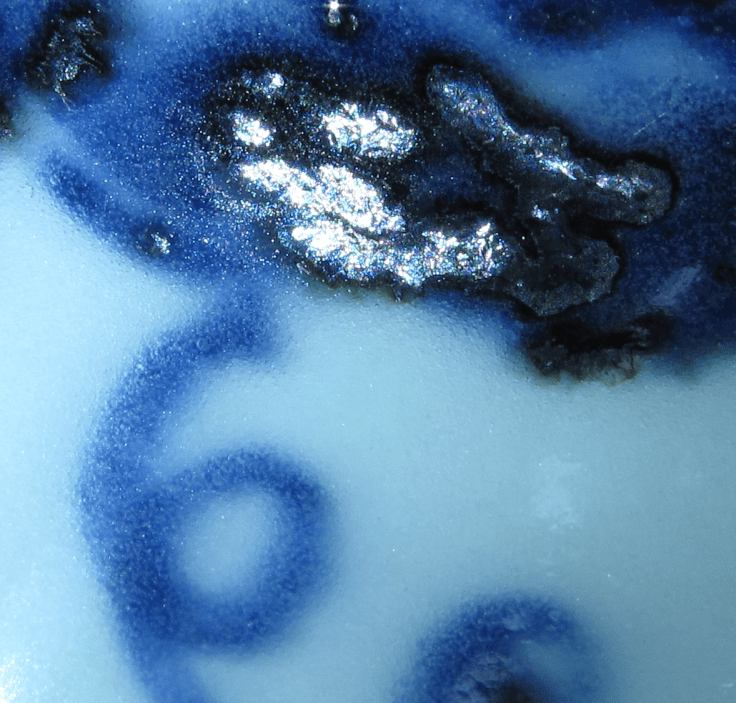
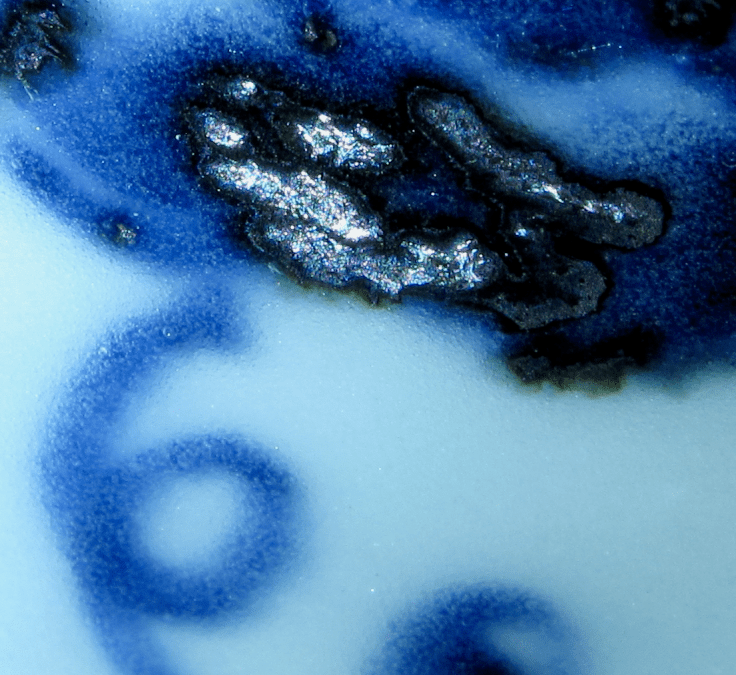 Figure 4
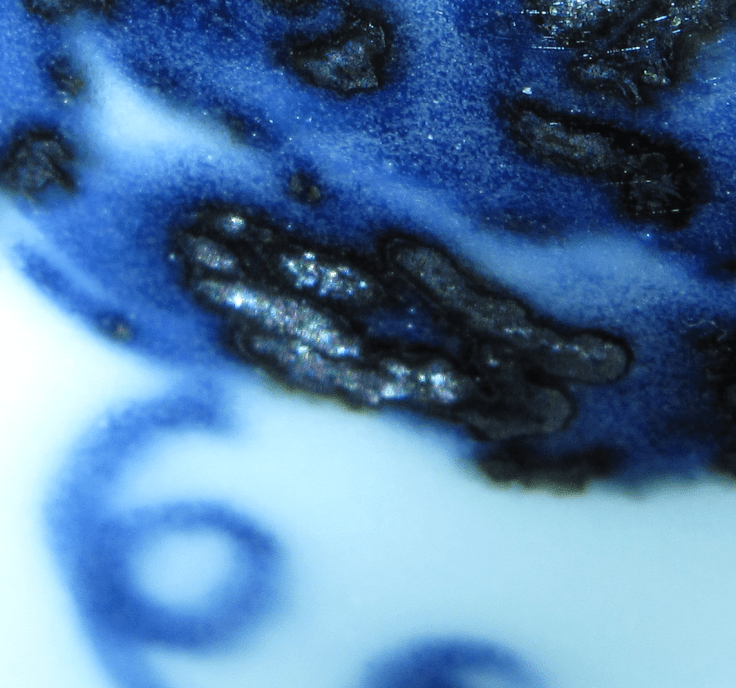 Figure 5
 Figure 6
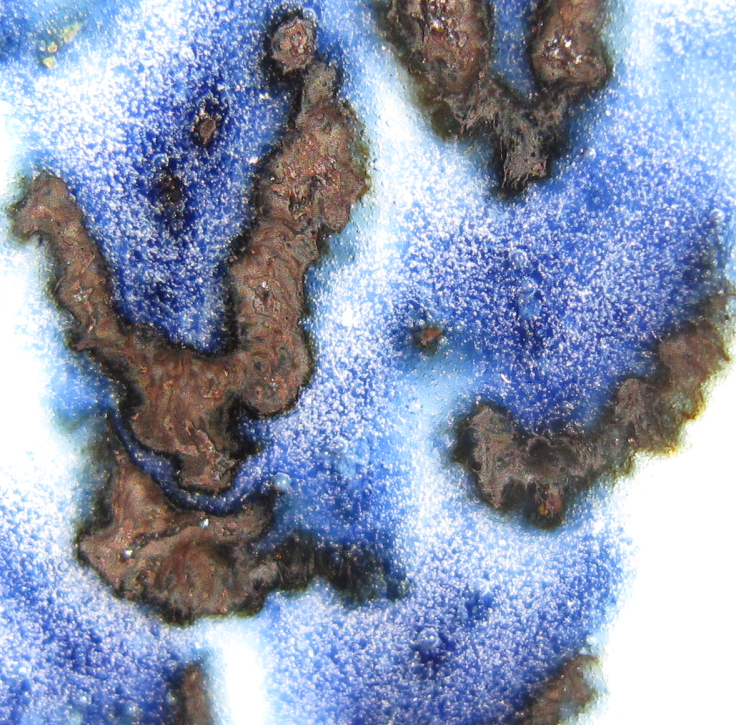 Figure 7
 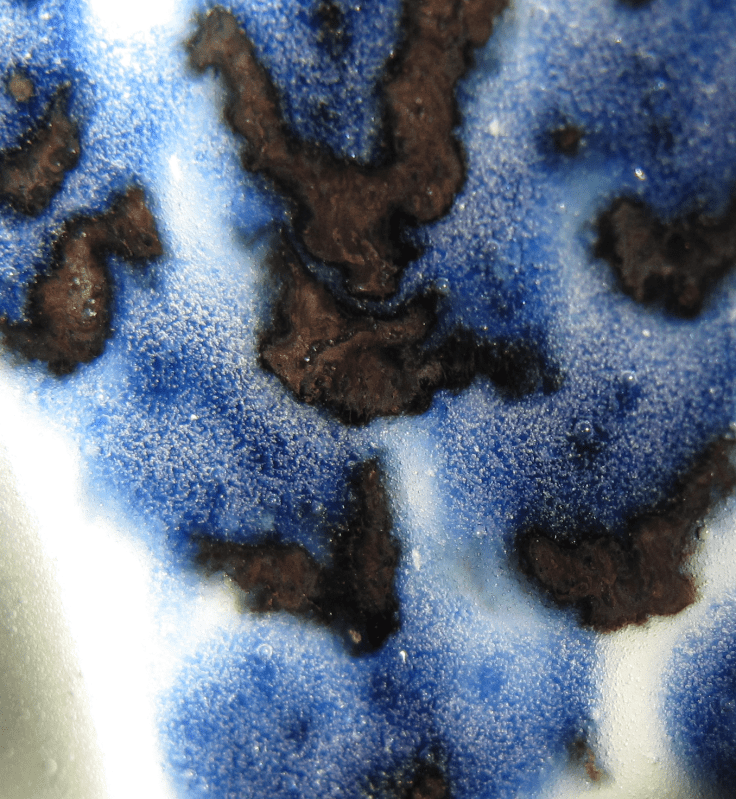 Figure 8
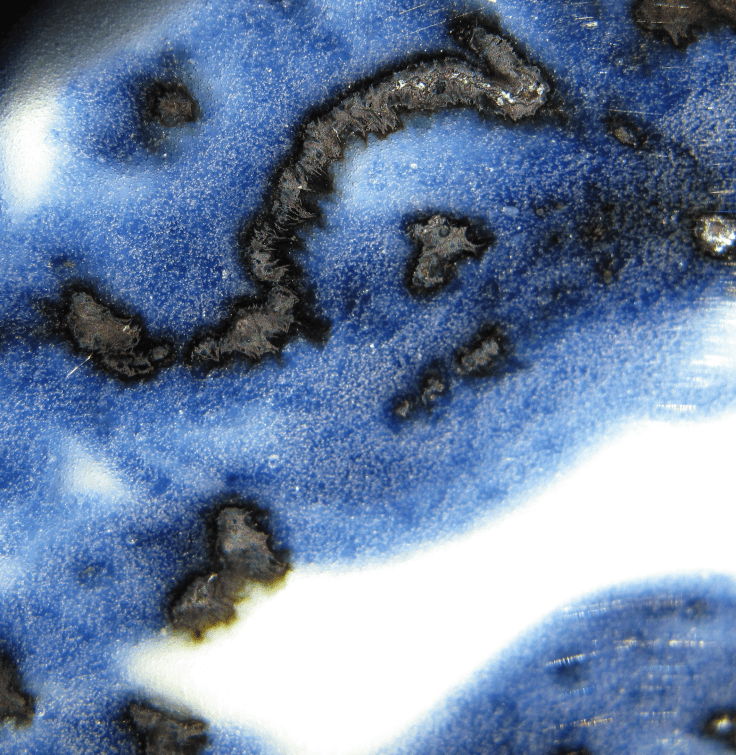 Figure 9
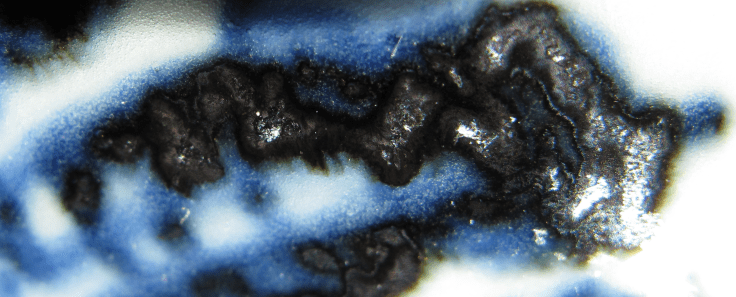 Figure 10
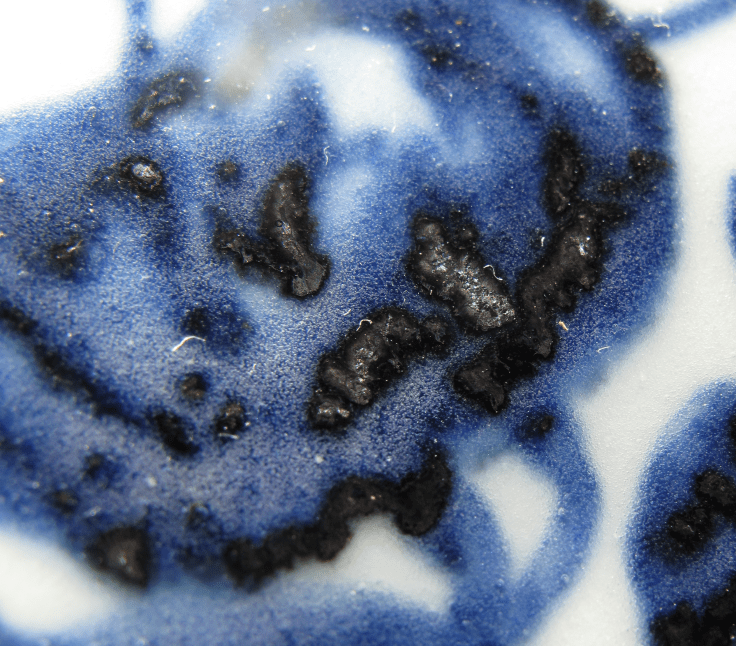 Figure 11
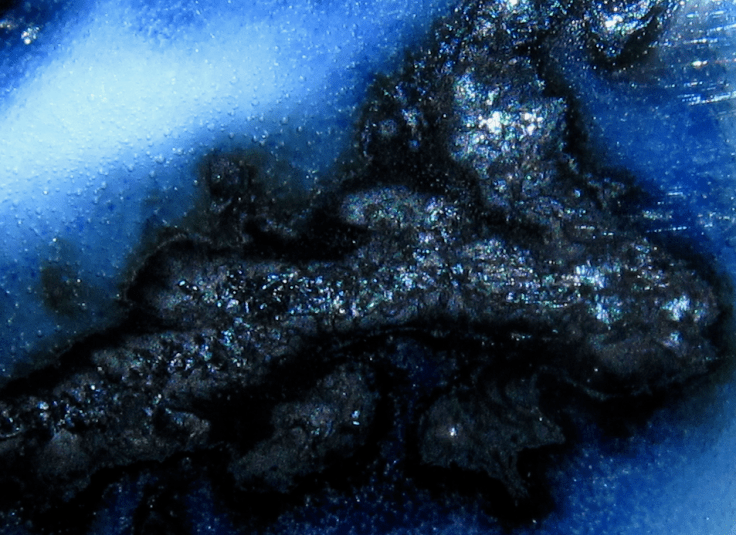 Figure 12
  Figure 13
  Figure 14
 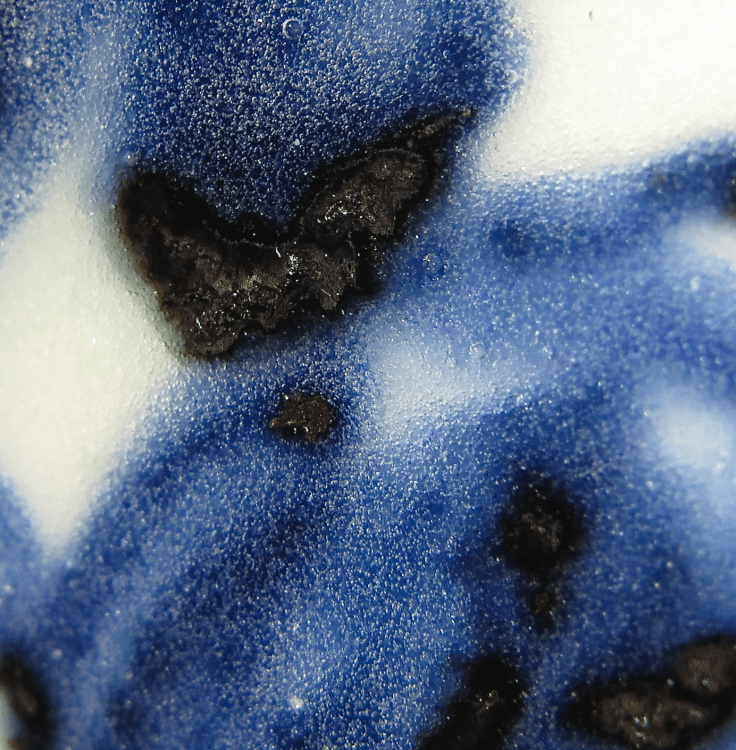 Figure 15
 Figure 16
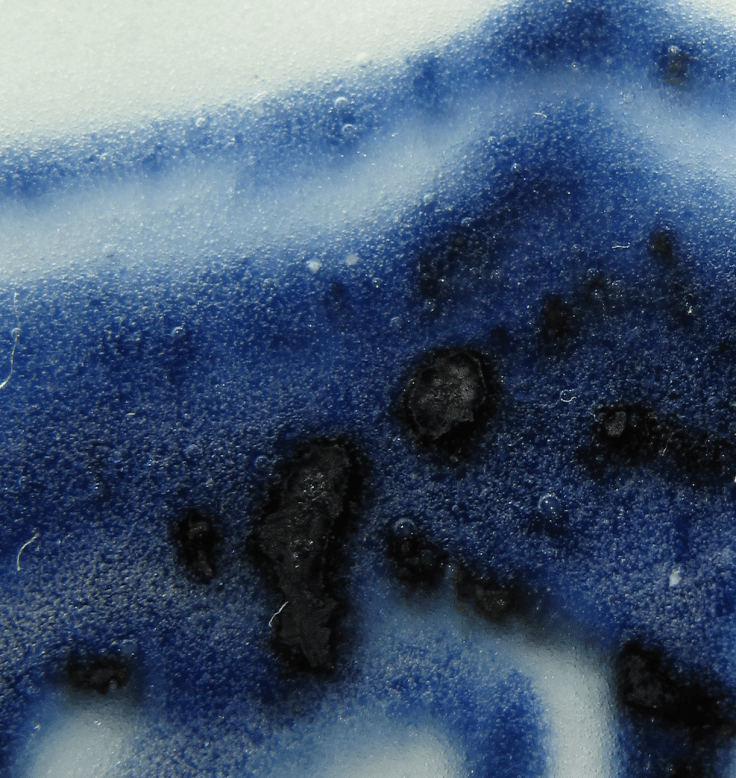 Figure 17
 Figure 18
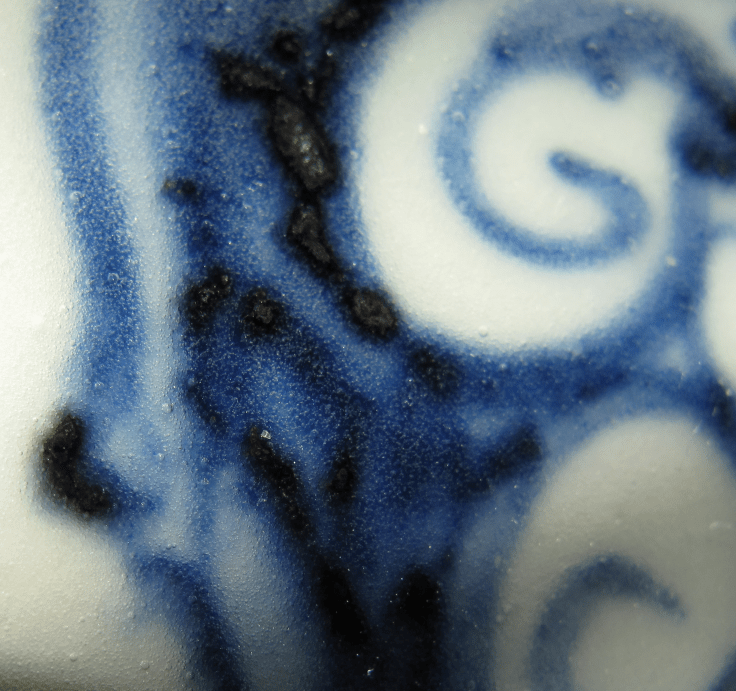 Figure 19
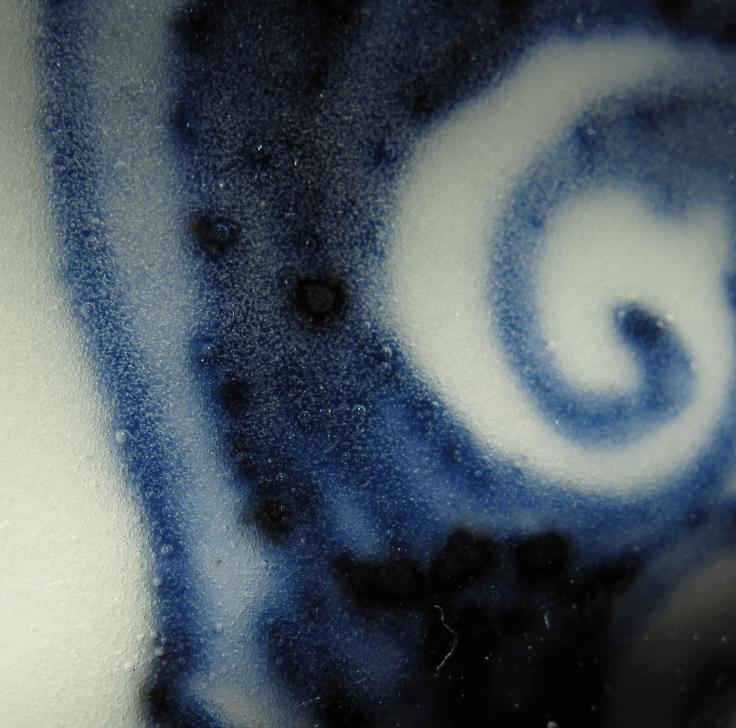 Figure 20
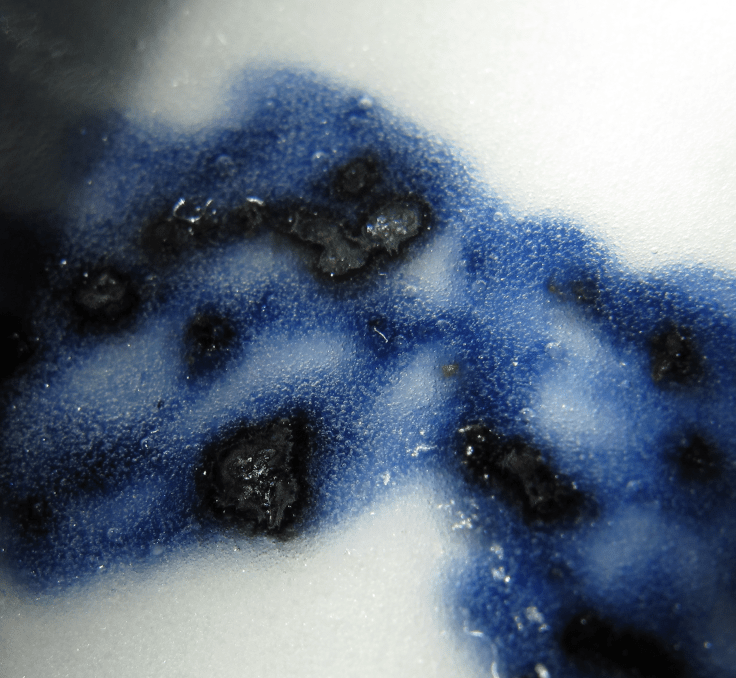 Figure 21
 Figure 22
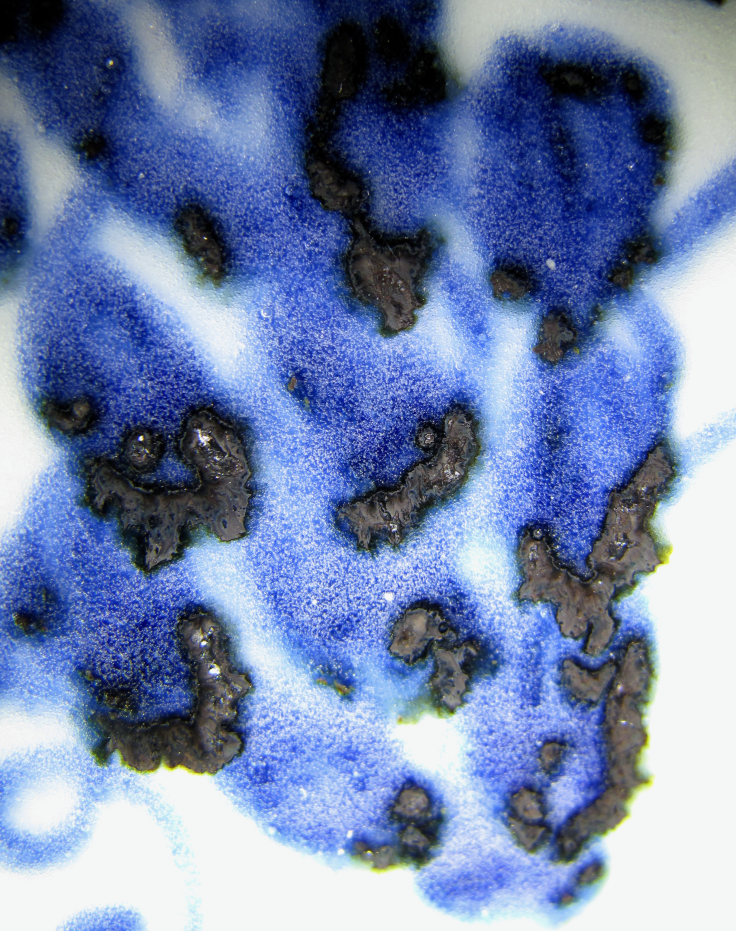 Figure 23
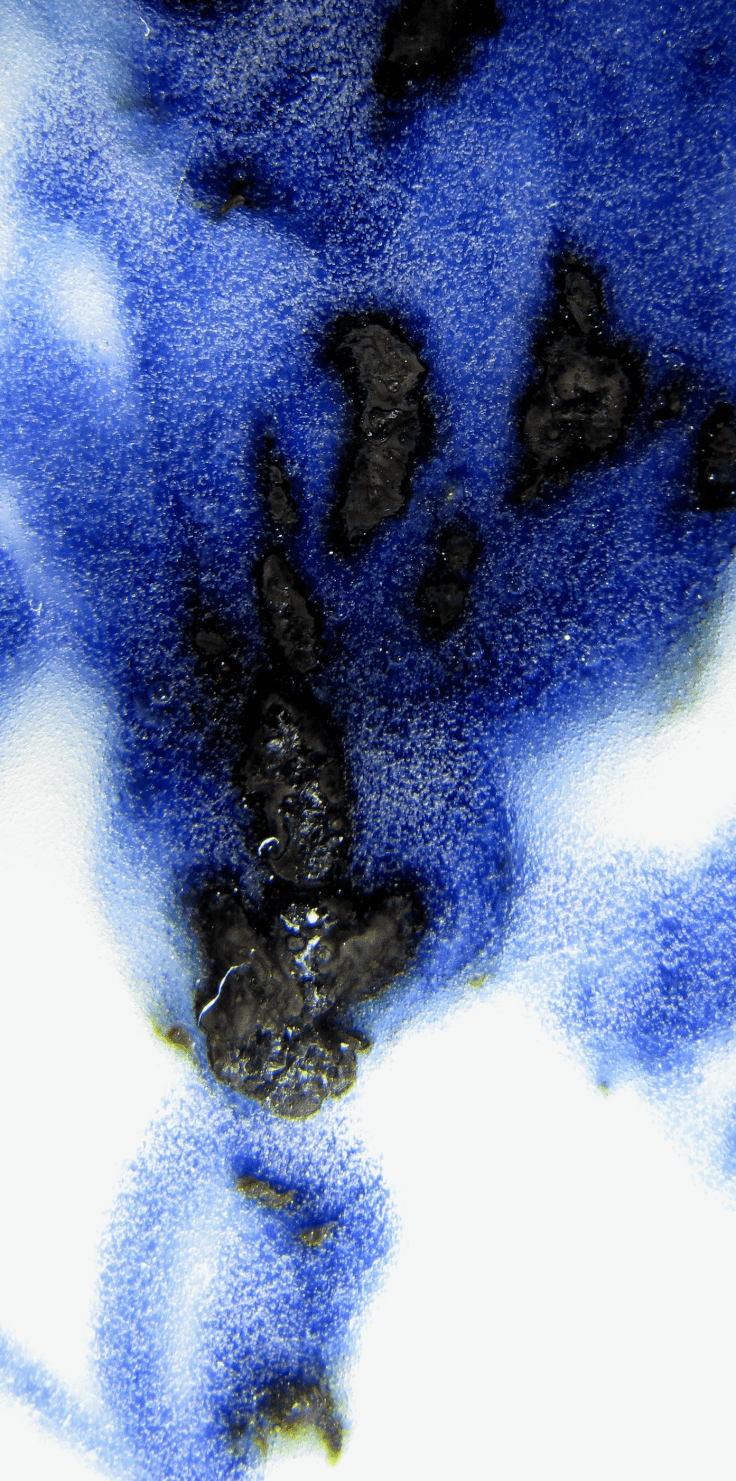 Figure 24
 Figure 25