
A Yuan Charger with a Lohan in Relief
In this article, I am going to show you a Yuan Charger with a Lohan sculptured out in relief at the center of the flat part of the plate. The charger measures 17 inches in diameter, and is 2 7/8 inches high. The Lohan with a tiger at his feet is the tiger-taming Lohan. It is more than 9 inches in length and rises almost exactly 2 inches above the flat part. This is an extremely rare charger (Figure 1).
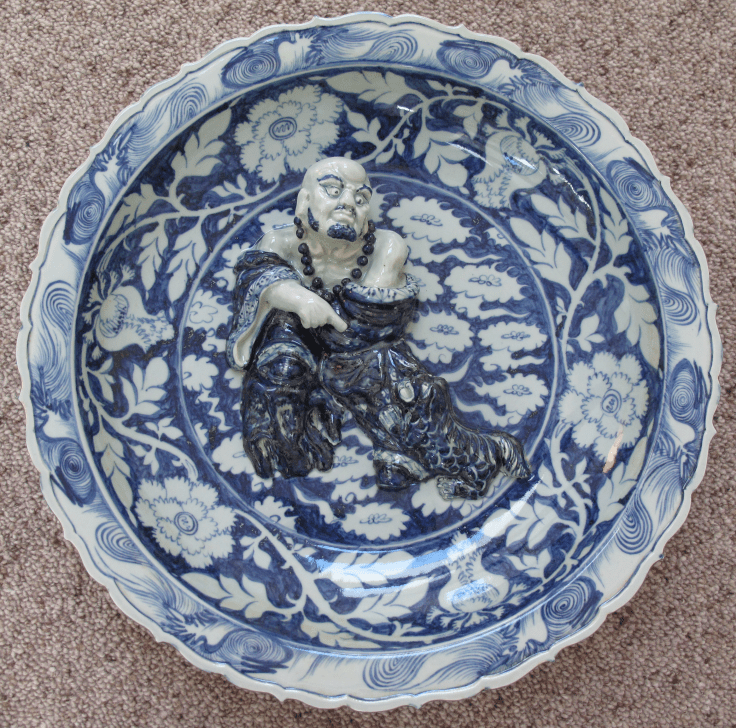 Figure 1
I suppose most of the readers might not have seen a charger similar to this, so I’ll show a few more detailed photos of the Lohan here.
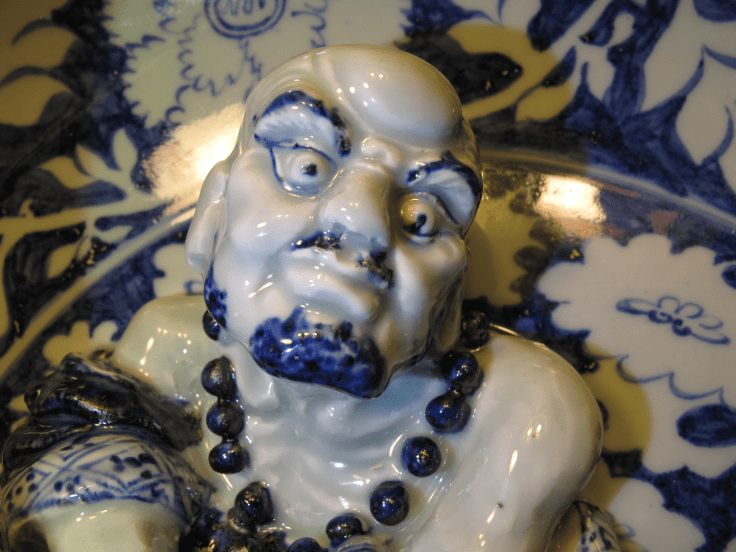 Figure 2
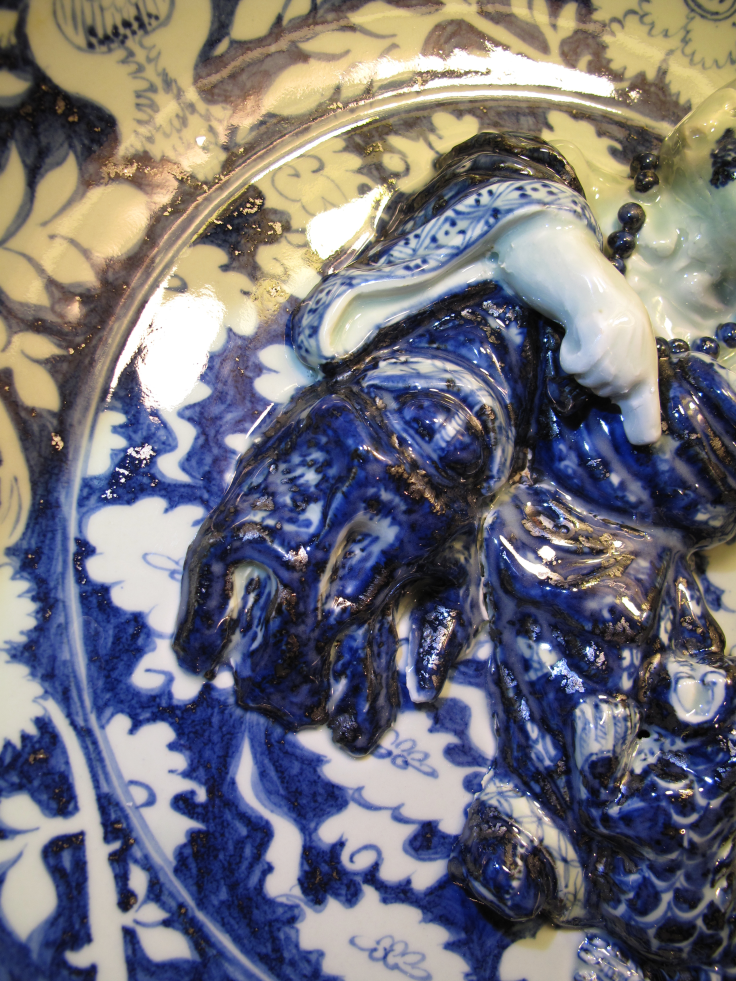 Figure 3
 Figure 4
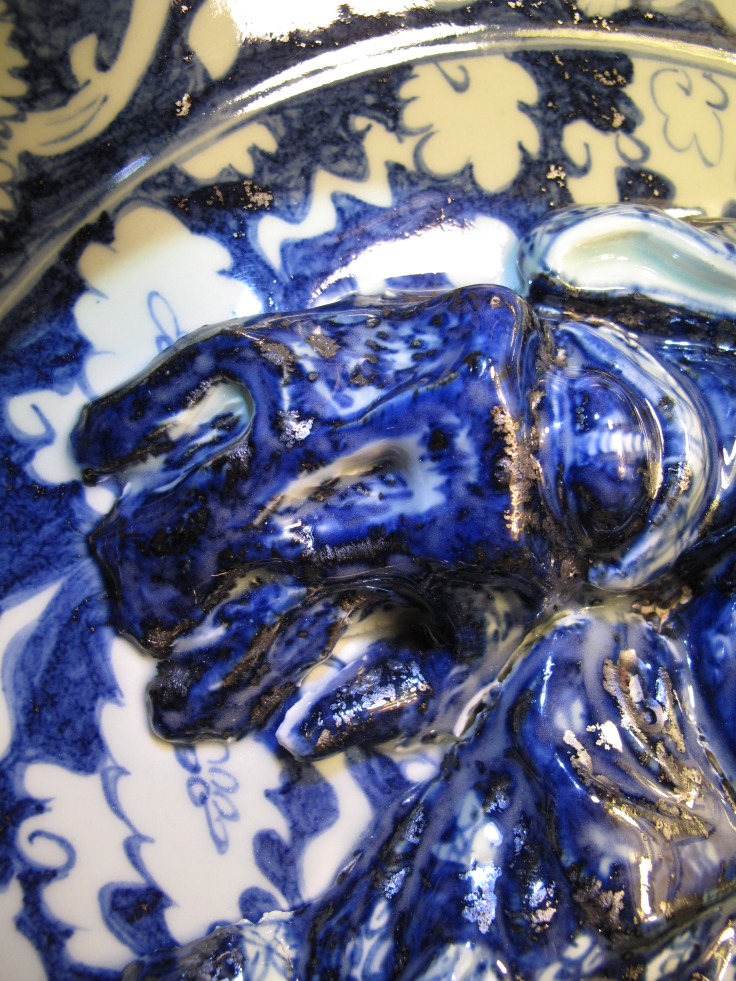 Figure 5
A look at these photos will tell us that the potter, in painting the motif, had used at least two different kinds of Sumali Blue dye. It has often been suggested that potters, in many instances, due to the very expensive nature of the dye, used different grades of Sumali Blue dye in one ware, the better grade was reserved for the main theme, whereas the less expensive grades would be used for the rest. A good example of using two grades of blue pigments in one single ware would be the chicken cup of the Chenghua period. Look at the big hen’s eye. It always has a sapphire blue color with very clear large bubbles even though the rest of the blue motif might not have the same blue color. In the absence of these features in the chicken eye, you must be very careful if the chicken cup is genuine. Of course I am not saying that a chicken cup with very nice blue color and clear and large bubbles in the hen’s eye is necessarily genuine. That is not true, and the question is very complicated. A lot of other factors are in play. All that I am trying to say is that potters in those times paid a lot of attention to details. The Chenghua potters used the best blue dye for the hen’s eye, for the eye in any painting is very important to the Chinese.
I have a suspicion that potters in the Chenghua period, which begins 29 years after the end of Xuande, still had some nice Sumali Blue dyes that were left and stored away by potters of the Xuande era. The amount would not be much, and potters were very careful with it, and would only use the dye in special circumstances, such as the chicken eye. In fact, some of the blue dye pigment used in the Jiajiung period still retained some characteristics of the Sumali blue dye, albeit there might be some other blue dye pigments added to it and mixed with it. You may remember that exporters stopped exporting the Sumali Blue dye at the end of the Xuande period, and the rule of Jiajing is more than 80 years after Xuande. It only shows how potters in those times treasured the Sumali Blue dye pigment that were left behind. It is something of an heirloom.
Let us now get back to this Yuan charger. Here, the Lohan in relief has a very beautiful sapphire blue color, and with plenty of plaques too. The blue color of the rest of the charger is clearly of a different shade—lacking the bright sapphire color that the Lohan carries. Nevertheless, the dye is still a very good dye, as close-up photos of the dye will show.
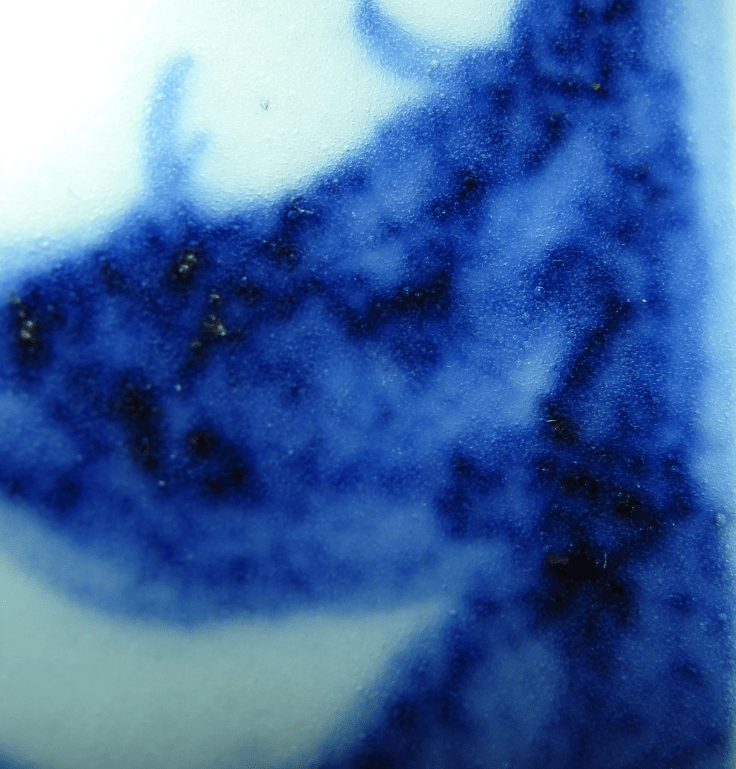 Figure 6
Figure 6 is taken from the flat part of the charger close to the Lohan. It has all the beautiful features of a nice Sumali Blue dye. The mottling is characteristic. It is not from some deliberate effort of the painter, rather it is dye pigments deposited randomly on the clay surface. It is always a beautiful sight, and can only be seen in good Sumali Blue dyes. Then there are the very deep blue color patches, nearly black. In the midst of the dark blue coloration or right next to them, are the large bubbles. These large bubbles are not nearly as large as those large bubbles in the Yongle period, a feature that is common in the Yuan B & Ws. The small bubbles and the plaques are no different from typical Sumali Blue dye.
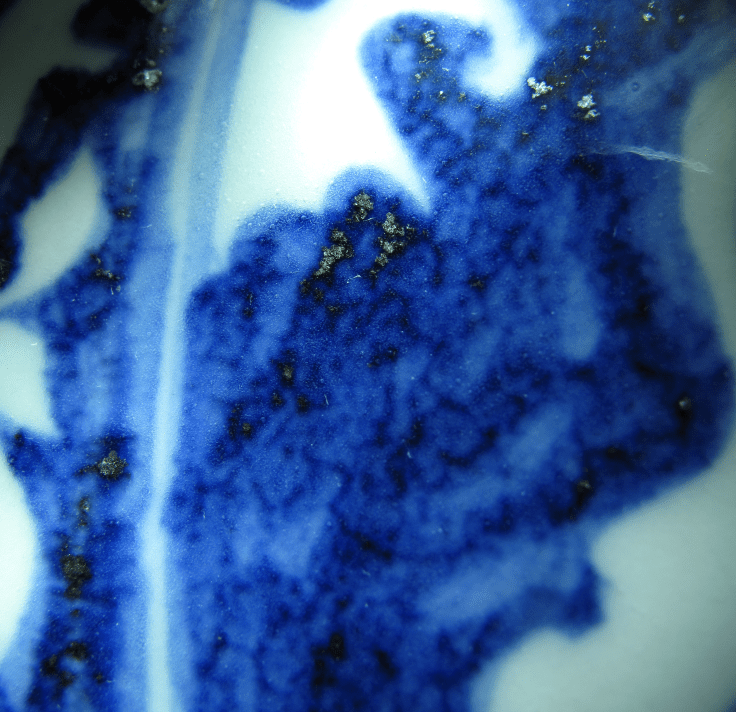 Figure 7
Figure 7 is basically very similar to Figure 6. Compare them carefully and you will agree that they are almost the same.
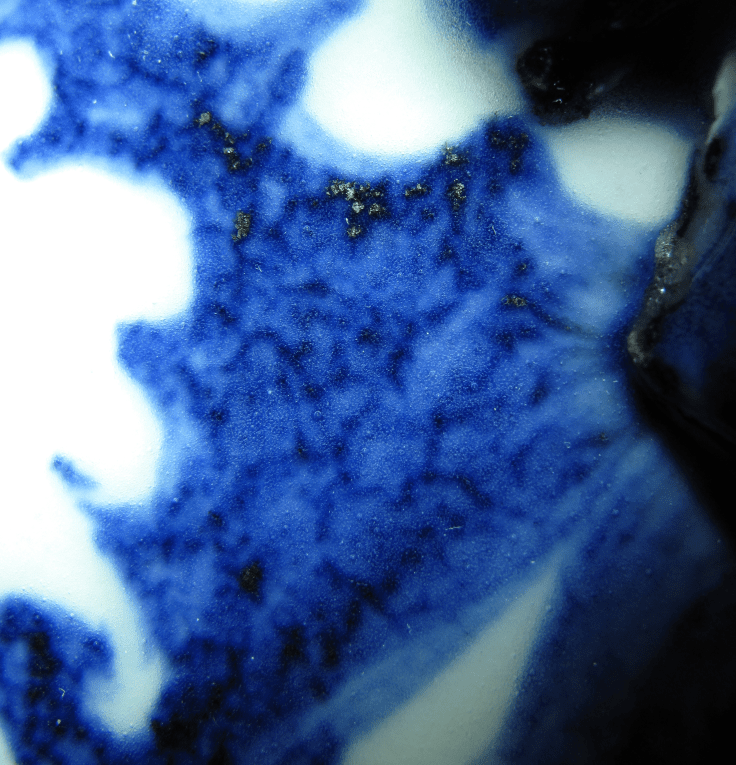 Figure 8 IMG_8315.JPG
Figure 8 is another similar photo. Here you can see the Lohan on the right.
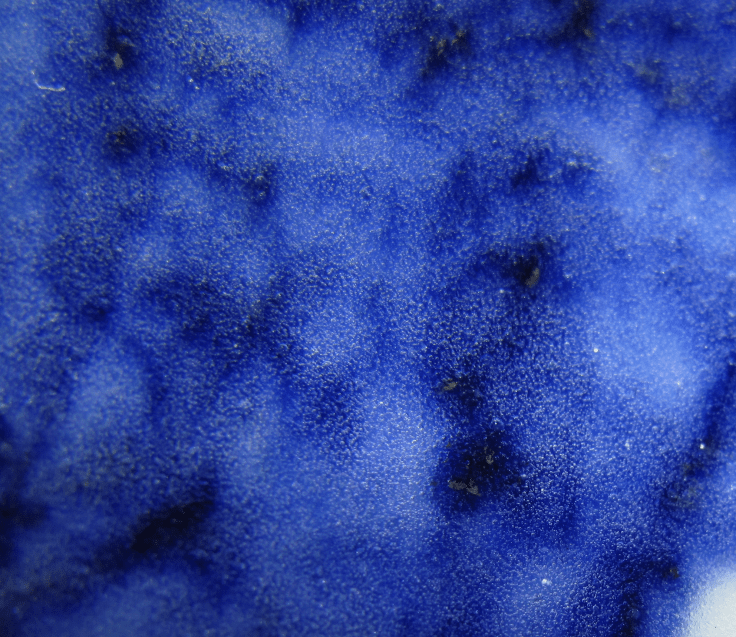 Figure 9
Here in Figure 9, the small bubbles are more dense, and you can easily see the lacunae. The mottling, the dark blue patches, the large bubbles and the plaques, while show variations from the previous photos, are basically the same. Same can be said of Figure 10 below.
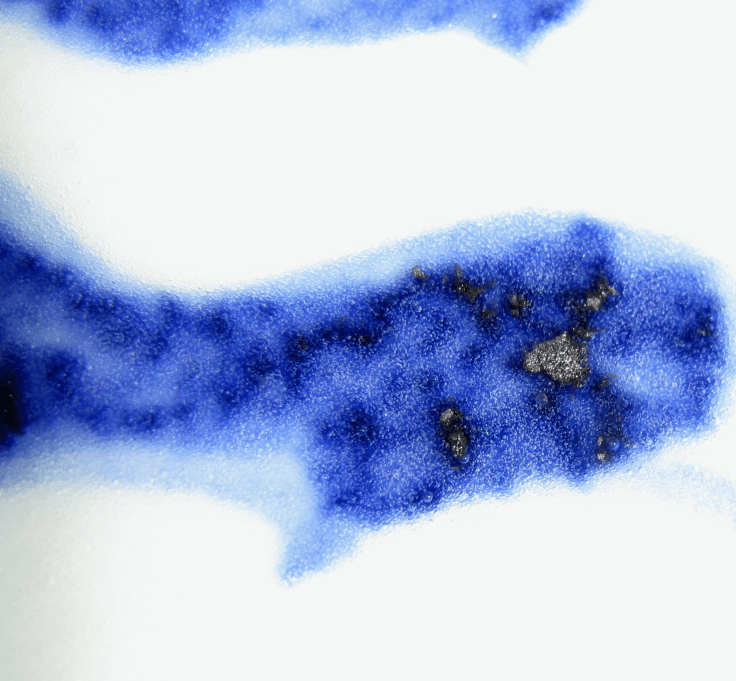 Figure 10
Now, look at Figure 11 and Figure 12. They are taken from the decorative pattern in the rim. Here, the mottling is not at all obvious. The blue patches are still there. But there are a lot more large bubbles. Do you think this is another grade of Sumali Blue dye that is different from the dye in the flat part of the charger?
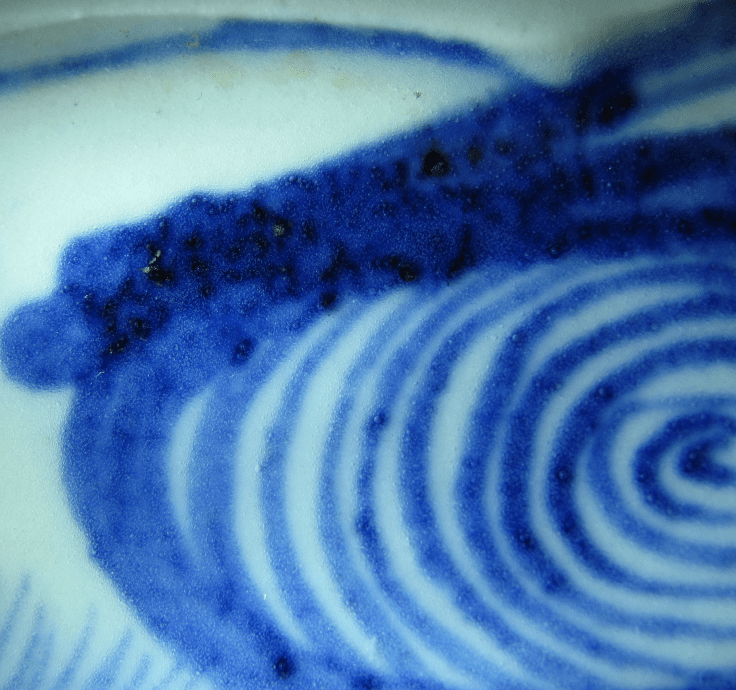 Figure 11
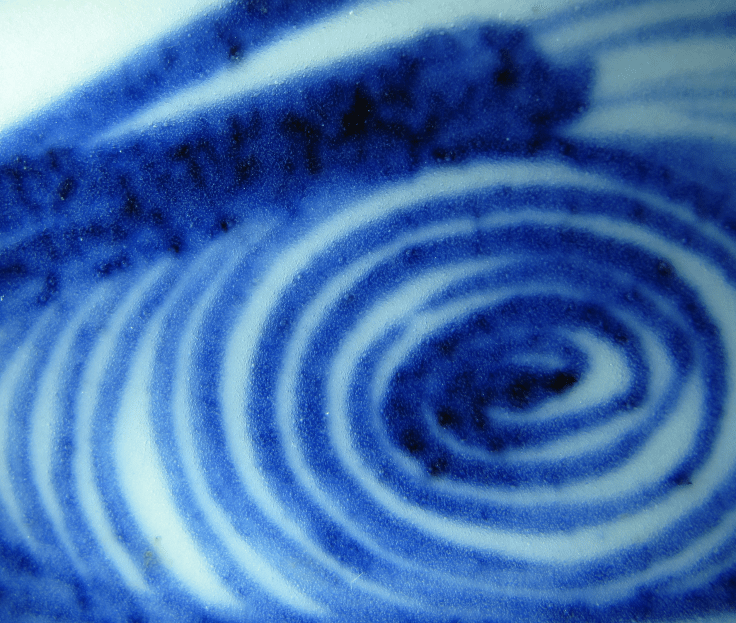 Figure 12
We must now look at the blue dye over the Lohan, the figure in relief. Look at the Lohan again. We can almost say that nowhere in the figure is there any flat area. It is all sloping down, many a time from the ridge, into sort of a valley or a groove. Over the ridge, the curvature does not allow the glaze, even viscous glaze, to accumulate, so that the glaze layer is necessarily thin. Whereas over the valleys and grooves, the shape of the contour is such that it would hold a lot more glaze than a flat surface. I’ll show you photos of various parts of the Lohan, and as you study the particular features of the dye, you must bear in mind these geographical factors.
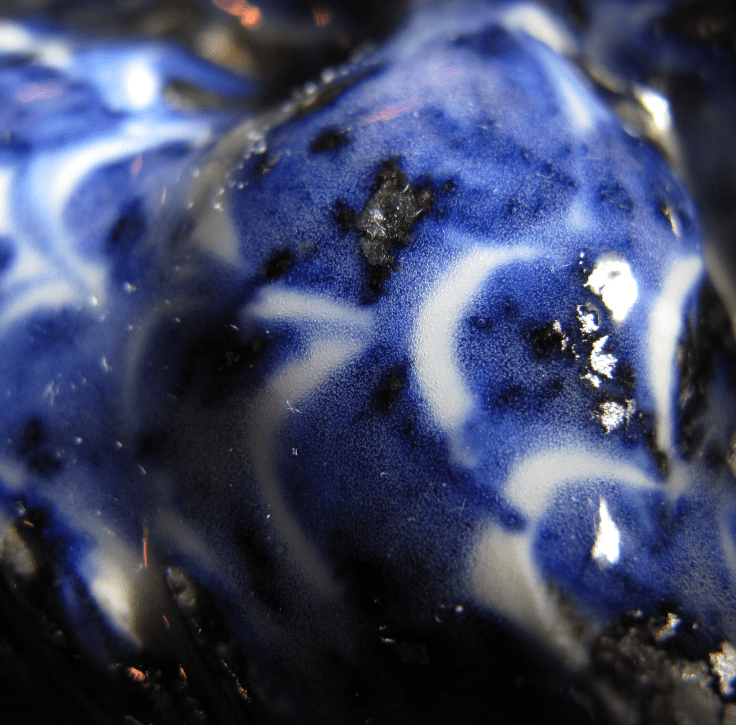 Figure 13
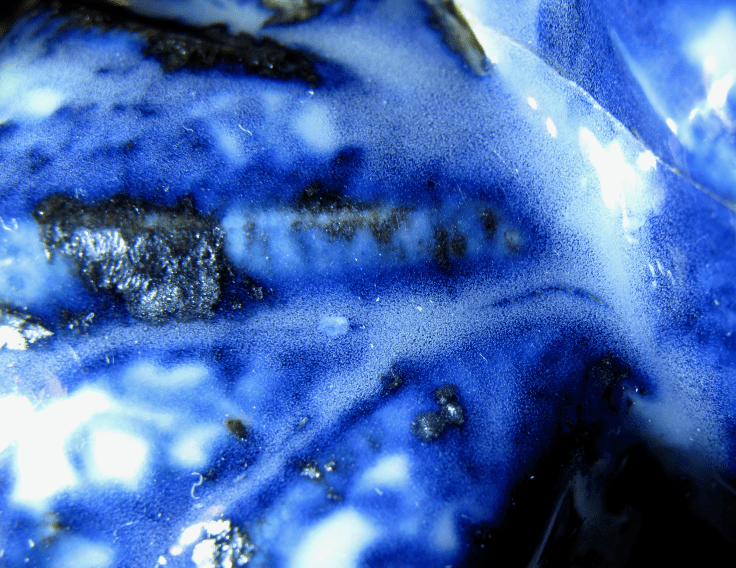 Figure 14
Compare Figure 13 to Figure 14. Figure 13 is like a slope. There is no ridge and no groove, which is what Figure 14 shows. The most striking part of these two photos is of course the vey beautiful sapphire blue color. Figure 13 shows this perfectly. It is about the best blue color one can ever get—the dark blue that is almost black, then the very deep blue, fading into the lighter blue in figure 14, and even here, it is a very nice blue color. There are a few relatively large bubbles in Figure 13, whereas in figure 14, the few large bubbles present are all in the margin of the deep blue color at the right lower corner. The appearance is consistent with the typical Sumali Blue dye pigment.
The small bubbles are worth noting in Figure 14. In the groove, the small bubbles are extremely packed, every single one of them gives you the impression that it is rising to the surface, as if it is trying to get out to the open air. Even then, the bubbles do not give us a feeling that they are in disarray. In fact, it is a sight we love. But why are there no large bubbles among the small ones, and none on the ridge too? I suppose the ingredient giving rise to the small bubbles is different from that giving rise to the large bubbles. It has a greater specific gravity, which allows it to slide down the sharp ridge faster. As a result, the groove area is filled with small bubbles. Why then there is no large bubbles at or around the ridge? I can only say that the angle there is sharp, and the fall of the surface rather vertical. There is no place for a thick glaze to build up there, particularly when the nature of the glaze is thin. With just a thin glaze, large bubbles would not be formed.
The sharp ridge can also explain the appearance of the plaque and the blackish streaks over the ridge in Figure 14. As I have already postulated, the plaques have quite a number of ingredients. Some have higher specific gravity, some lower, than the glaze itself. The rather thick plaque, with a greater specific gravity, slides down the slope ahead of the glaze, giving rise to the appearance as shown here. The black streaks are other ingredients of the plaque, but they have a lighter specific gravity, so that, as every other ingredient is sliding down the sharp slope, some of these still remain on the ridge, while others are sliding down slowly, giving rise to an appearance as shown here. These black streaks are fairly common phenomenon whenever we encounter contour as that we have here.
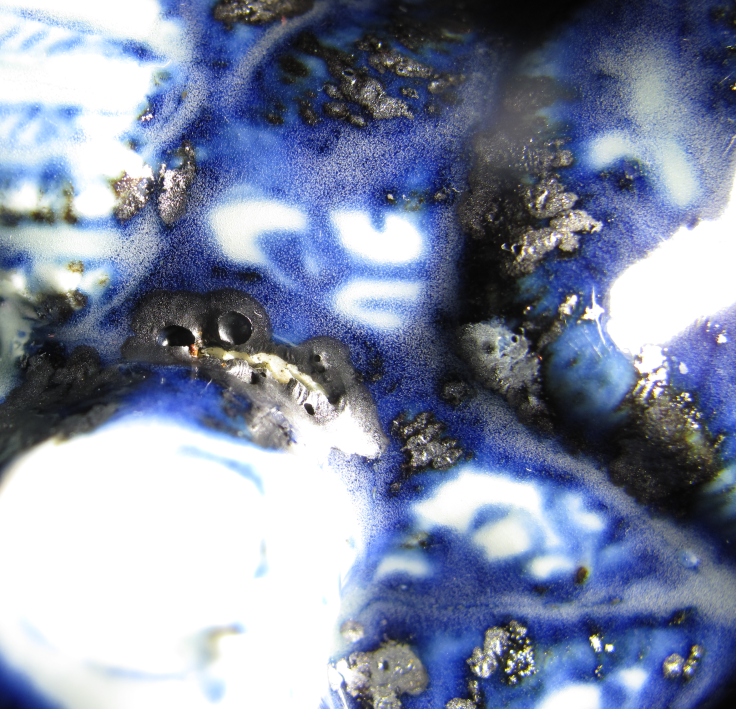 Figure 15
Figure 15 shows the very extensive plaques over the Lohan. Note also the bubbles and the drippings and blackish streaks. The are two very prominent craters amid the very thick plaque. They are formed because the plaque collapses over some thin areas that have not enough strong support.
 Figure 16
Figure 16 shows essentially the same features as the previous three photos.
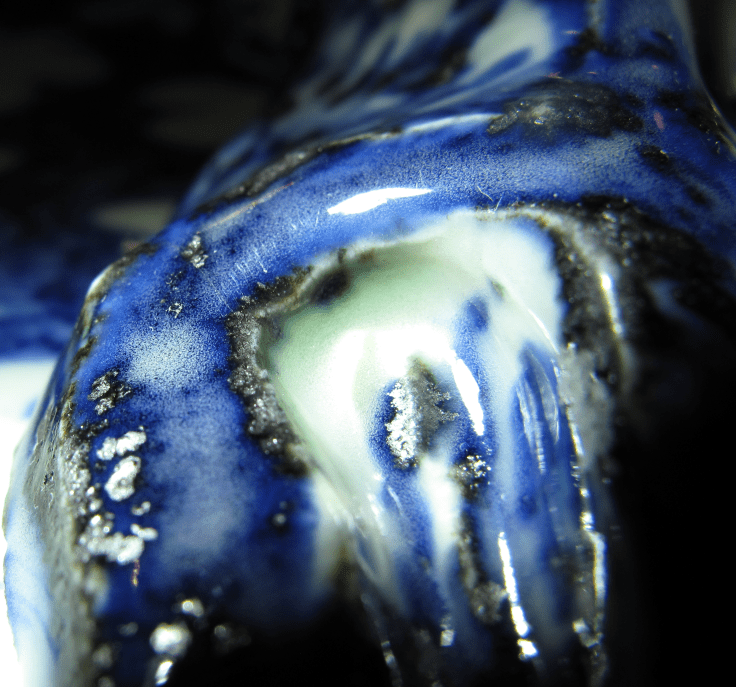 Figure 17
Now, in Figure 17, I want to draw your attention to one important feature. Look at the greenish area that is below the dripping that originates from the ridge right above it. The phenomenon of a greenish element spreading just beyond the last shade of the blackish dripping almost always indicates that the dye is of superb quality. And the very extensive greenish shade here is very seldom seen, a suggestion that the dye here is an exceptionally good dye.
Before I finish off with this article, I just want to show you a few more photos of this charger (Figures 18-21), so that you can be more familiar with the blue dye features of a Yuan B & W.
 Figure 18
 Figure 19
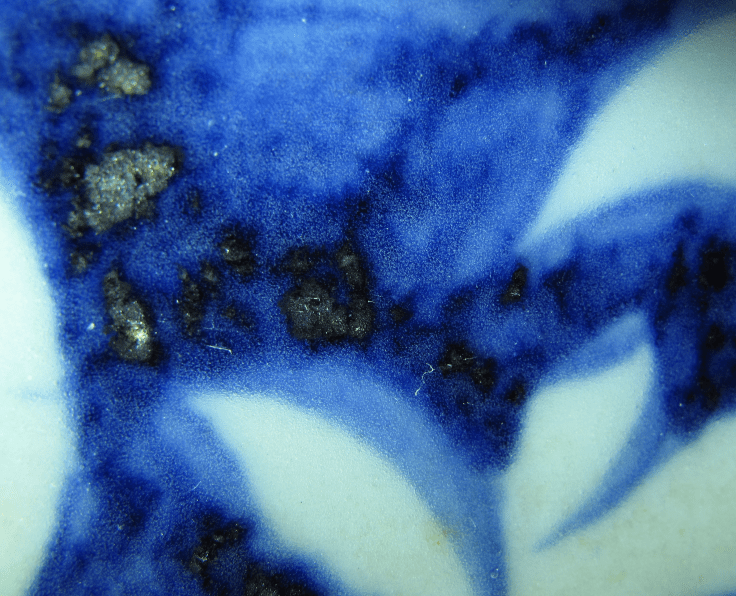 Figure 20
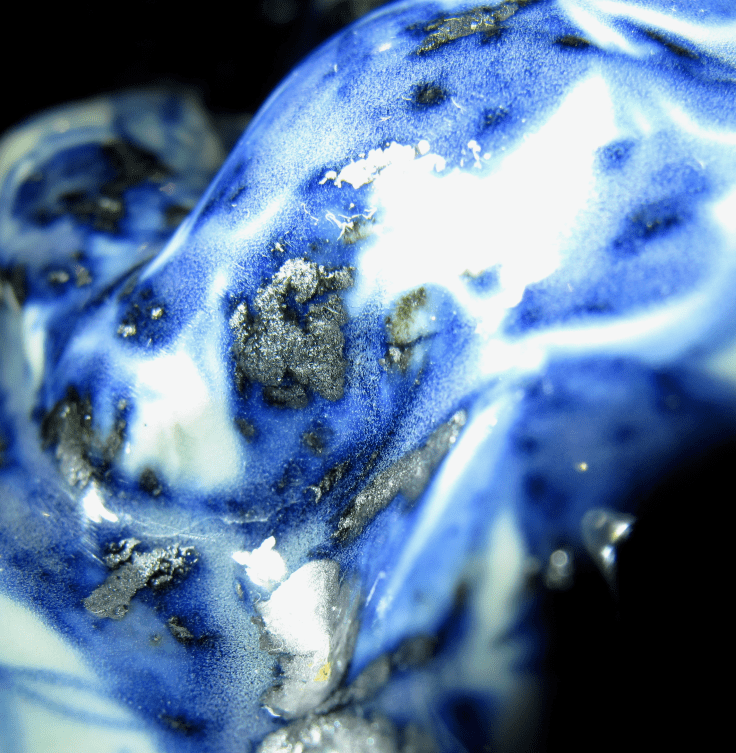 Figure 21

Leave a comment